Deploying a serverless application
Contents
Starting with AWS Lambda is really easy. You can even write a function in the browser! But that’s not how you should work on a daily basis. You must have a CI/CD pipeline set up, you probably have two accounts (one for production and another one for development), you need a repeatable and reliable way to create your infrastructure and so on. In this article I’ll show you how to create a simple continuous delivery pipeline that brings us closer to a professional application development.
Disclaimer
The goal of this article is not to show you how to build or test a serverless application, so the sample application will be extremely easy and the tests might not make sense. The goal is to learn how we can create a CD pipeline to deploy a serverless application.
Pre-requisites
To follow this article you’ll need:
- Two accounts in AWS, one simulating the development and the other one simulating the production environment.
- A CircleCI account set up.
- NodeJS installed in your computer.
- The serverless framework installed on your computer.
- An AWS profile created in your computer. In my case, the name of the profile is vgaltes-serverless
- jq installed on your computer.
##Sample application
Let’s start by creating a VERY simple NodeJS serverless application. So, open a terminal, create a new folder wherever you want, cd to it and type:
|
|
This will create a basic serverless project with a function that just says hello. Now it’s time to add a test to that function. Create a file called handler.spec.js and copy the following code in it:
|
|
Before being able to run this test, you need to install the packages:
|
|
We’re now very close to be able to run the test. Just add the following line inside the scripts section of the package.json file:
|
|
Run npm test and you should see a test passing
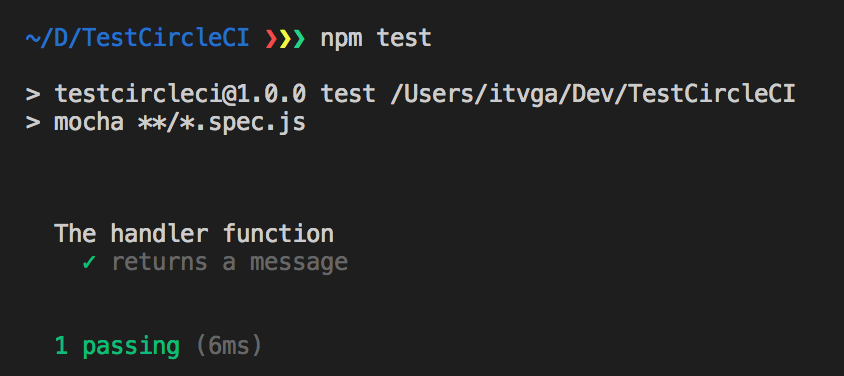
And that’s all! As I told you, we’re not going to be famous for writing a super-complex application.
A basic CI pipeline
Now it’s time to start working on our CI pipeline. I’ve chosen CircleCI because it’s a PAAS service and I wanted to try it out. Choose your preferred CI system here, the steps will be very similar.
As we’re using CircleCI, we need to create a folder named .circleci in the root of our project and a file named config.yml inside it. Do it and copy the followint yaml code in the file.
|
|
The code is pretty straightforward. We’re using a docker image with Node 8.10 inside it, checking out the code, installing the serverless framework, installing our project dependencies, run some unit tests and deploy to a stage called pre.
Configure CircleCI
Before pushing this file to github, we need to configure CircleCI to listen to our repository and execute the accions we set on the config.yml. First of all, create an administrator user for you CI (I named it circleci) and disable the console password so it only can access via code.
First of all, go to Add projects and click on the Set Up Project button of the project you want to add. Check that the operating system is linux and that the languaje is Node and click Start building. This will fire your first build.
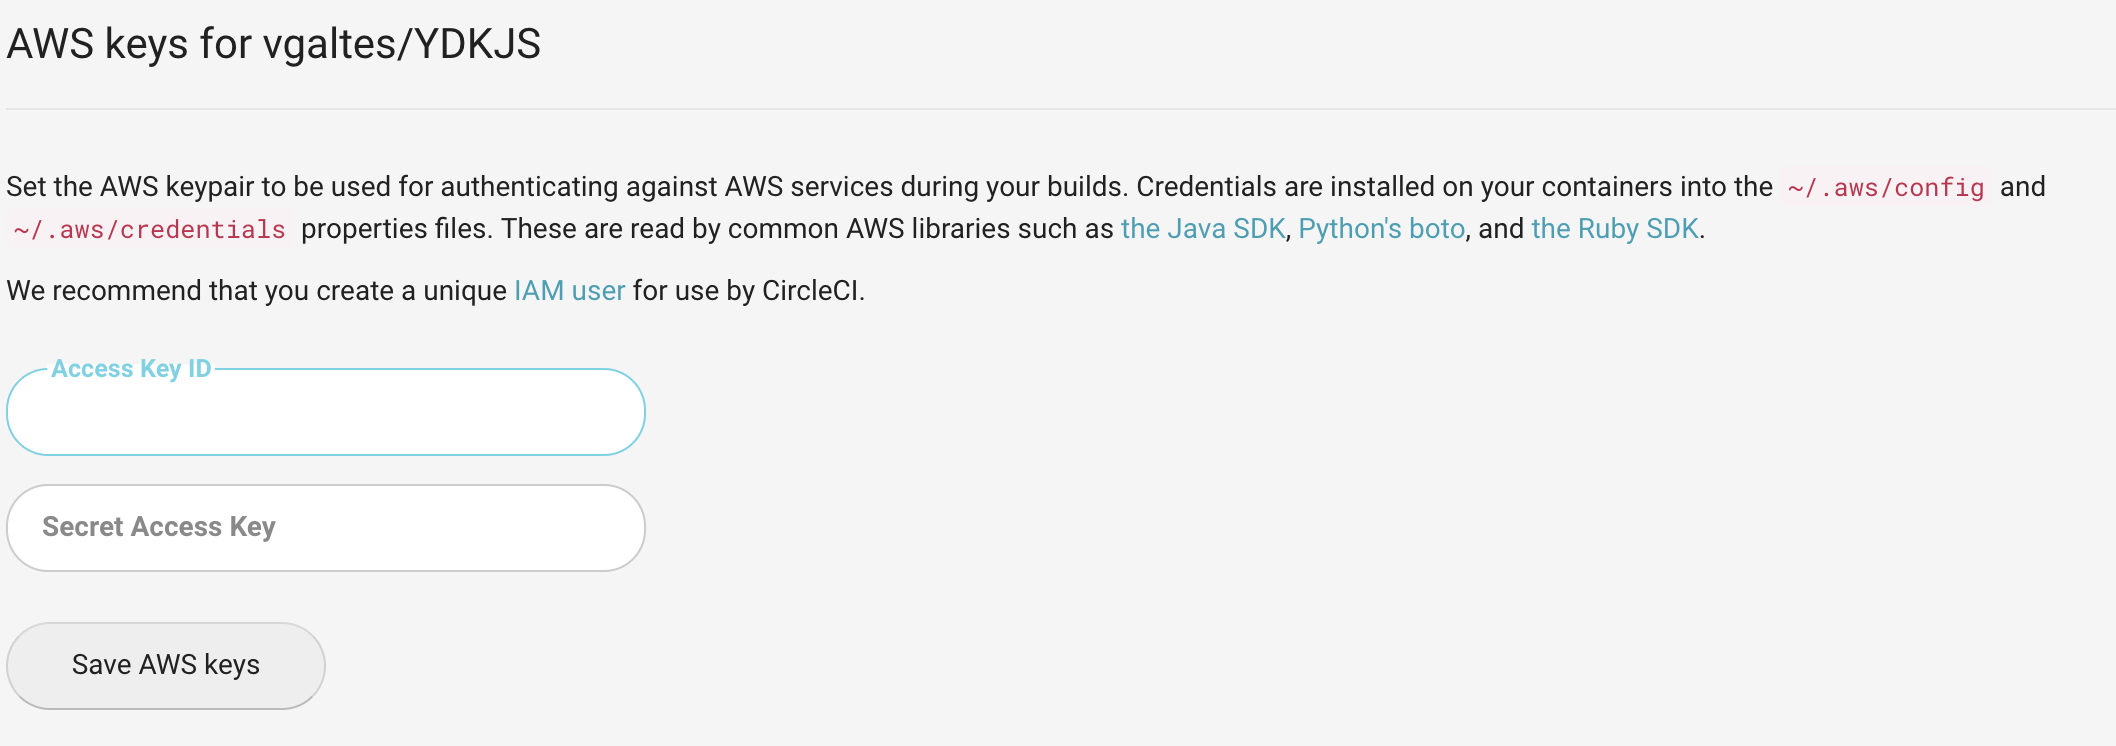
Now, click on the settings button of the builds page, on the top right corner. On the left hand side of the screen, there’s a section called permissions. Click the AWS Permissions button.

Set the keypair of your CI user there.
It’s time to push and see what happens in CircleCI.
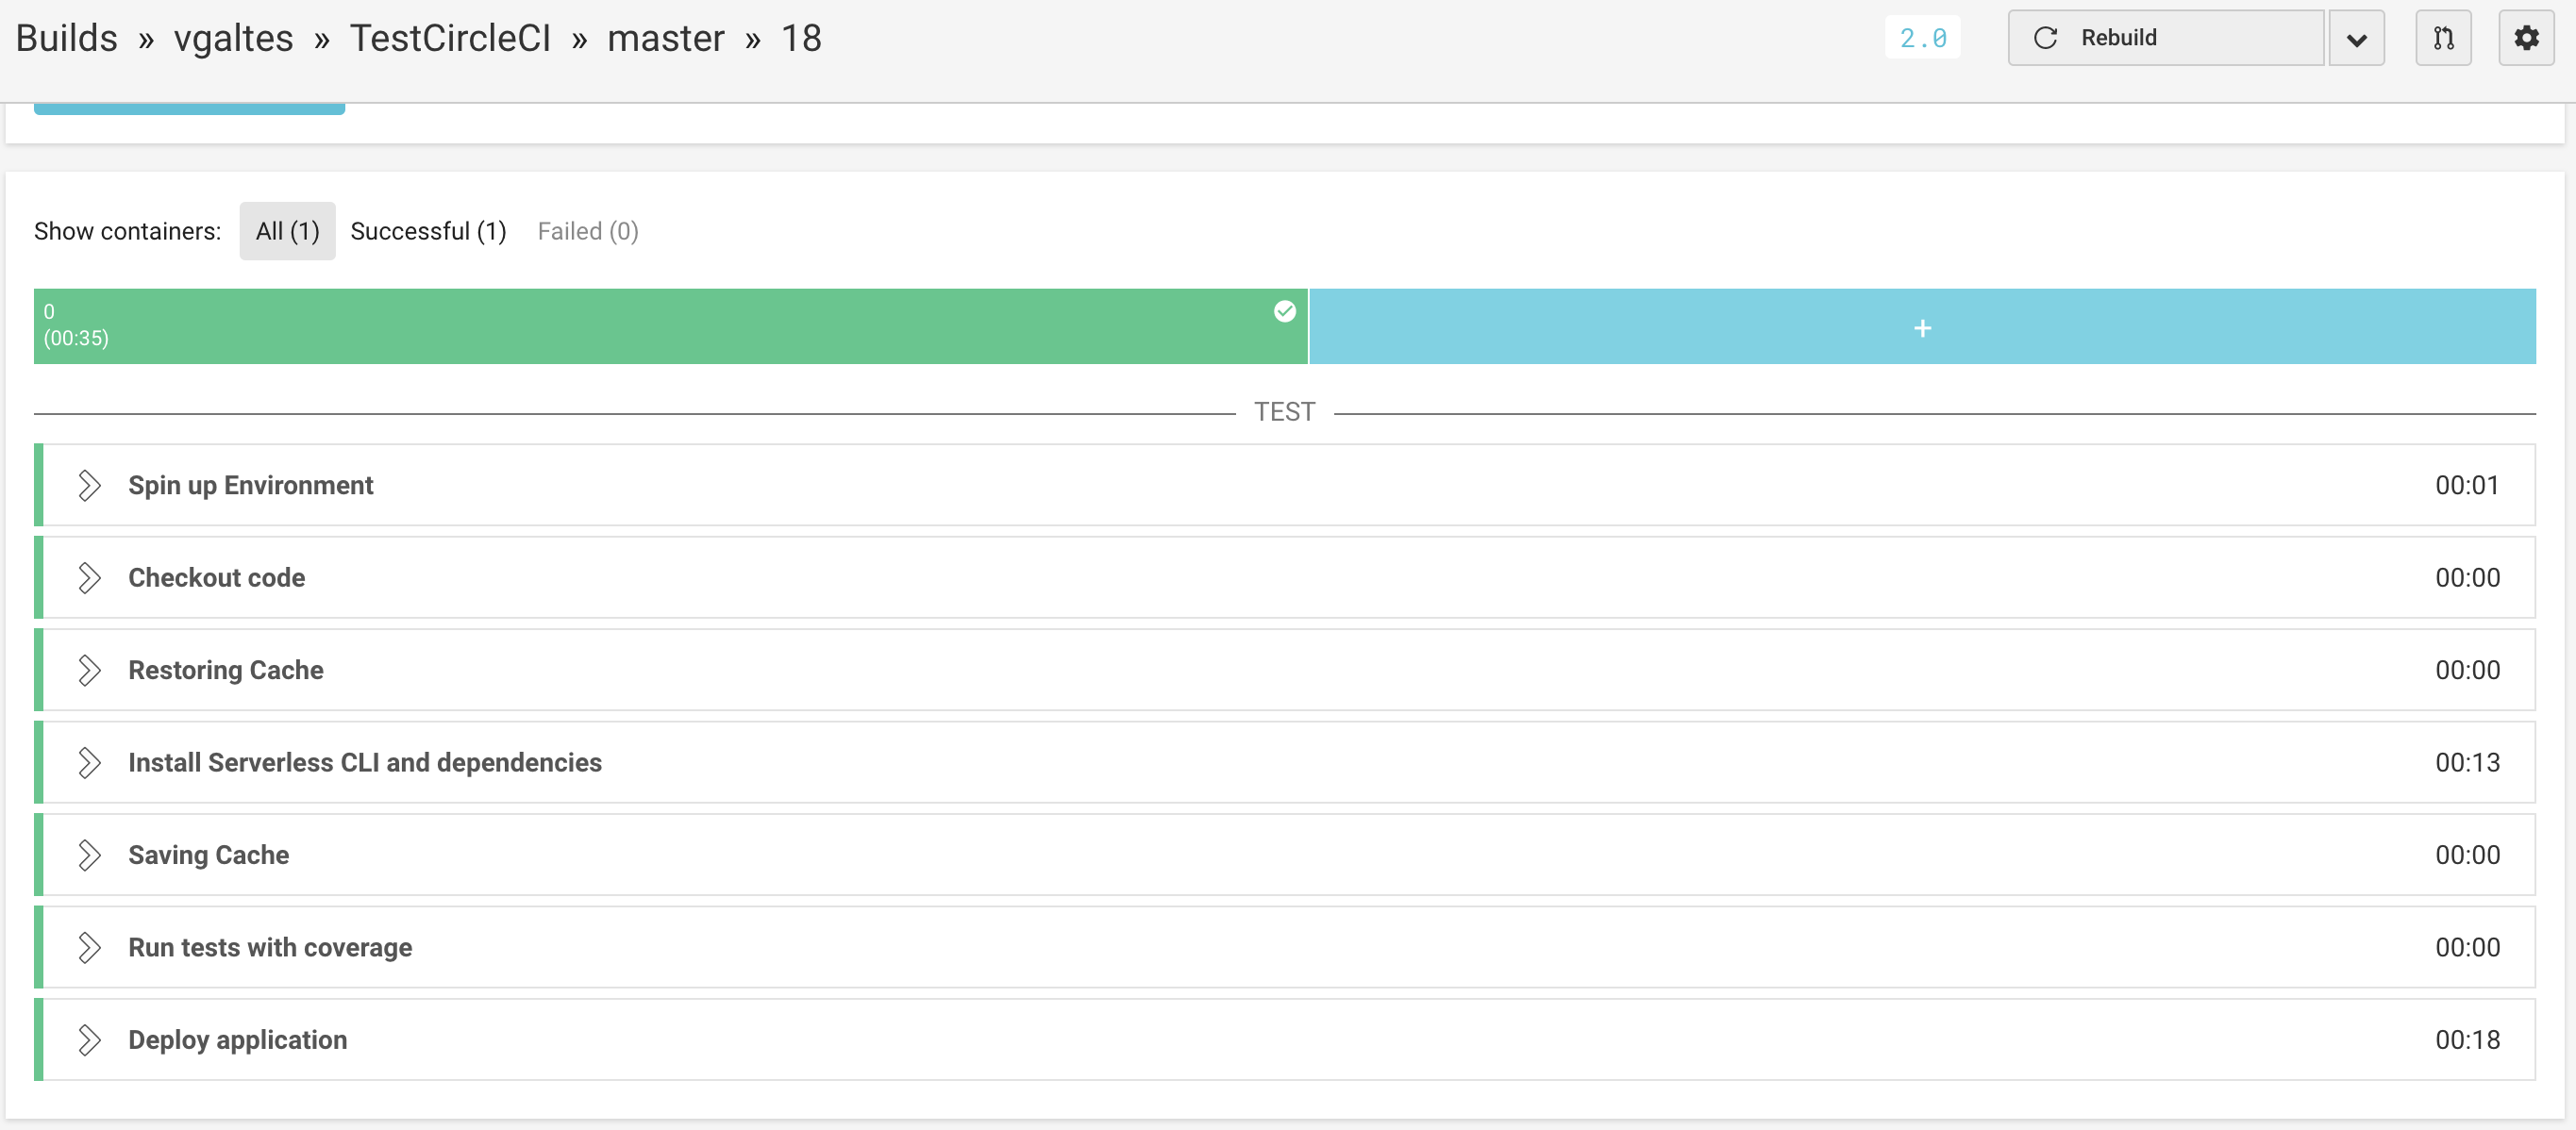
Everything looks good. Let’s take a look at our development account in AWS.
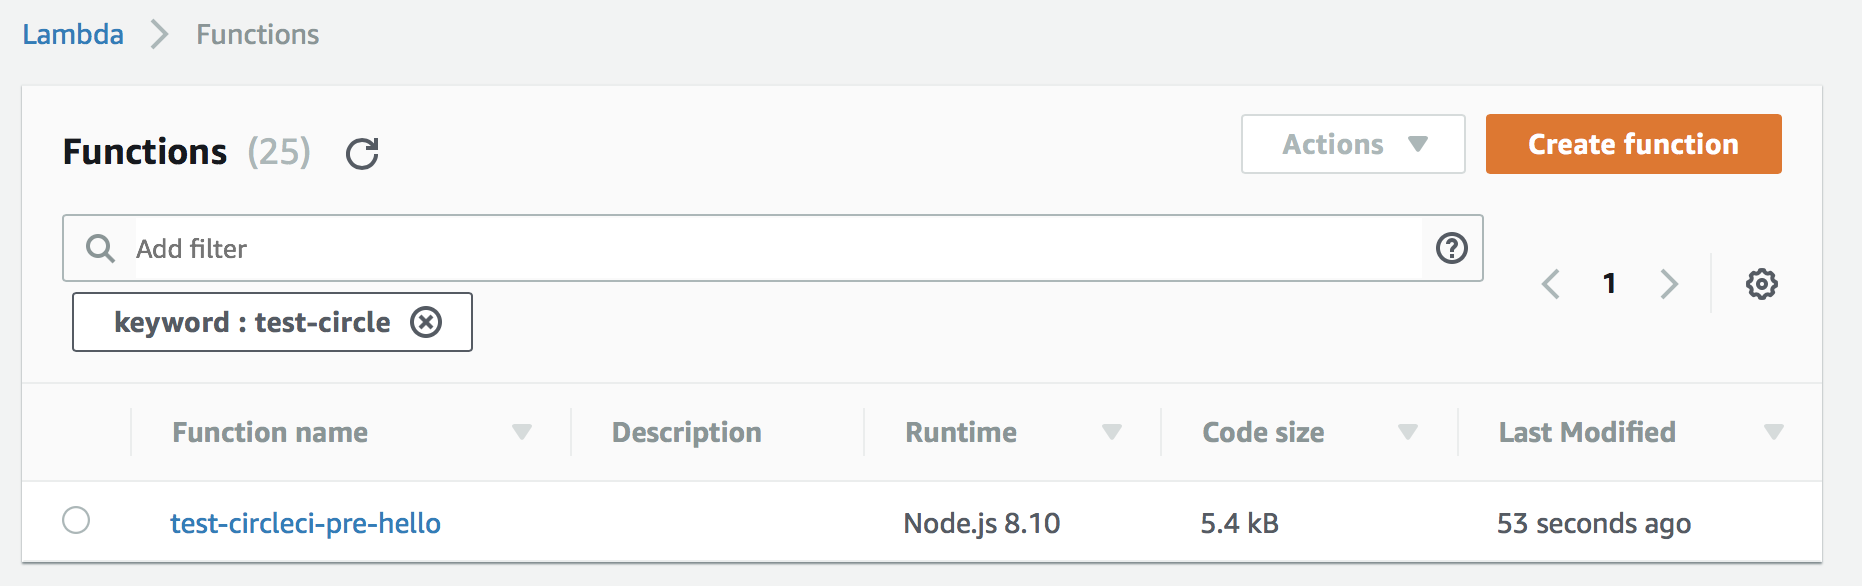
Voilà!
AWS Assume role
We now have a lambda deployed into our development account using CircleCI, which is pretty good. But most organisations have a completely separate account for their production stuff. How can we deploy from a system where we have a dev account configured to a completely different account? AWS Assume role to the rescue!
First of all we need to get the account id of our dev account. Go to support -> support center and get the id from there.
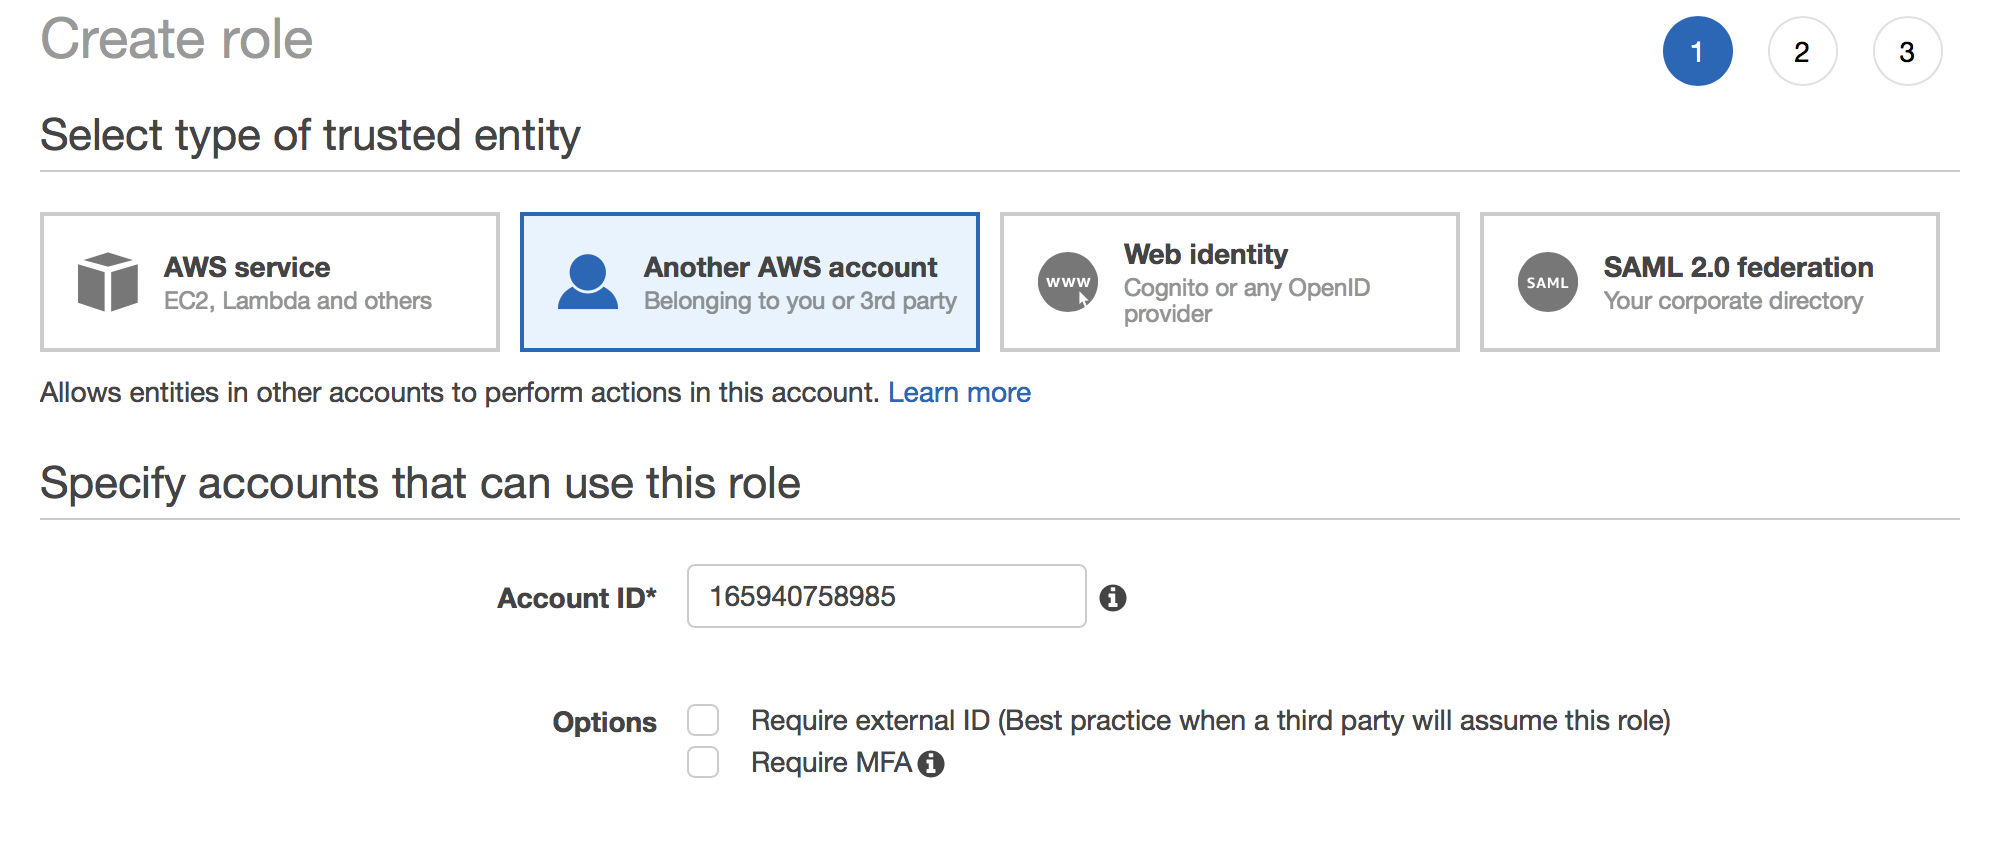
Now we need to create a role in the production account, so log in there with your administrator account and go to the IAM service and create a new role. The type should be “Another AWS Accound” and you must provide the dev account id.
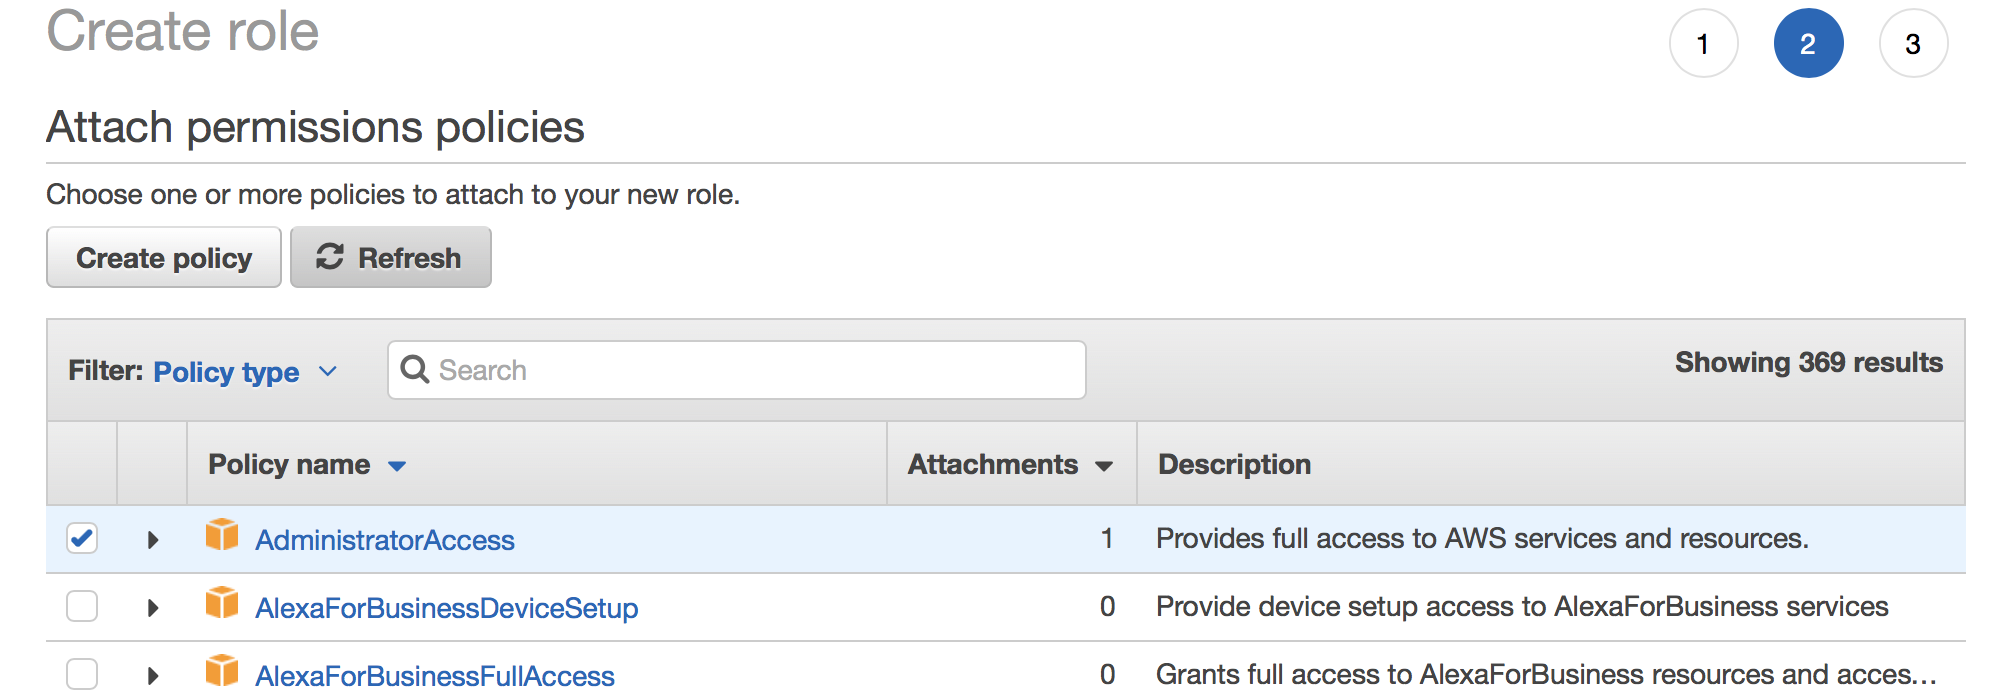
Clicking next we will provide the permissions for the role. Let’s choose administrative permissions for now to check that all works well and we’ll change that later.
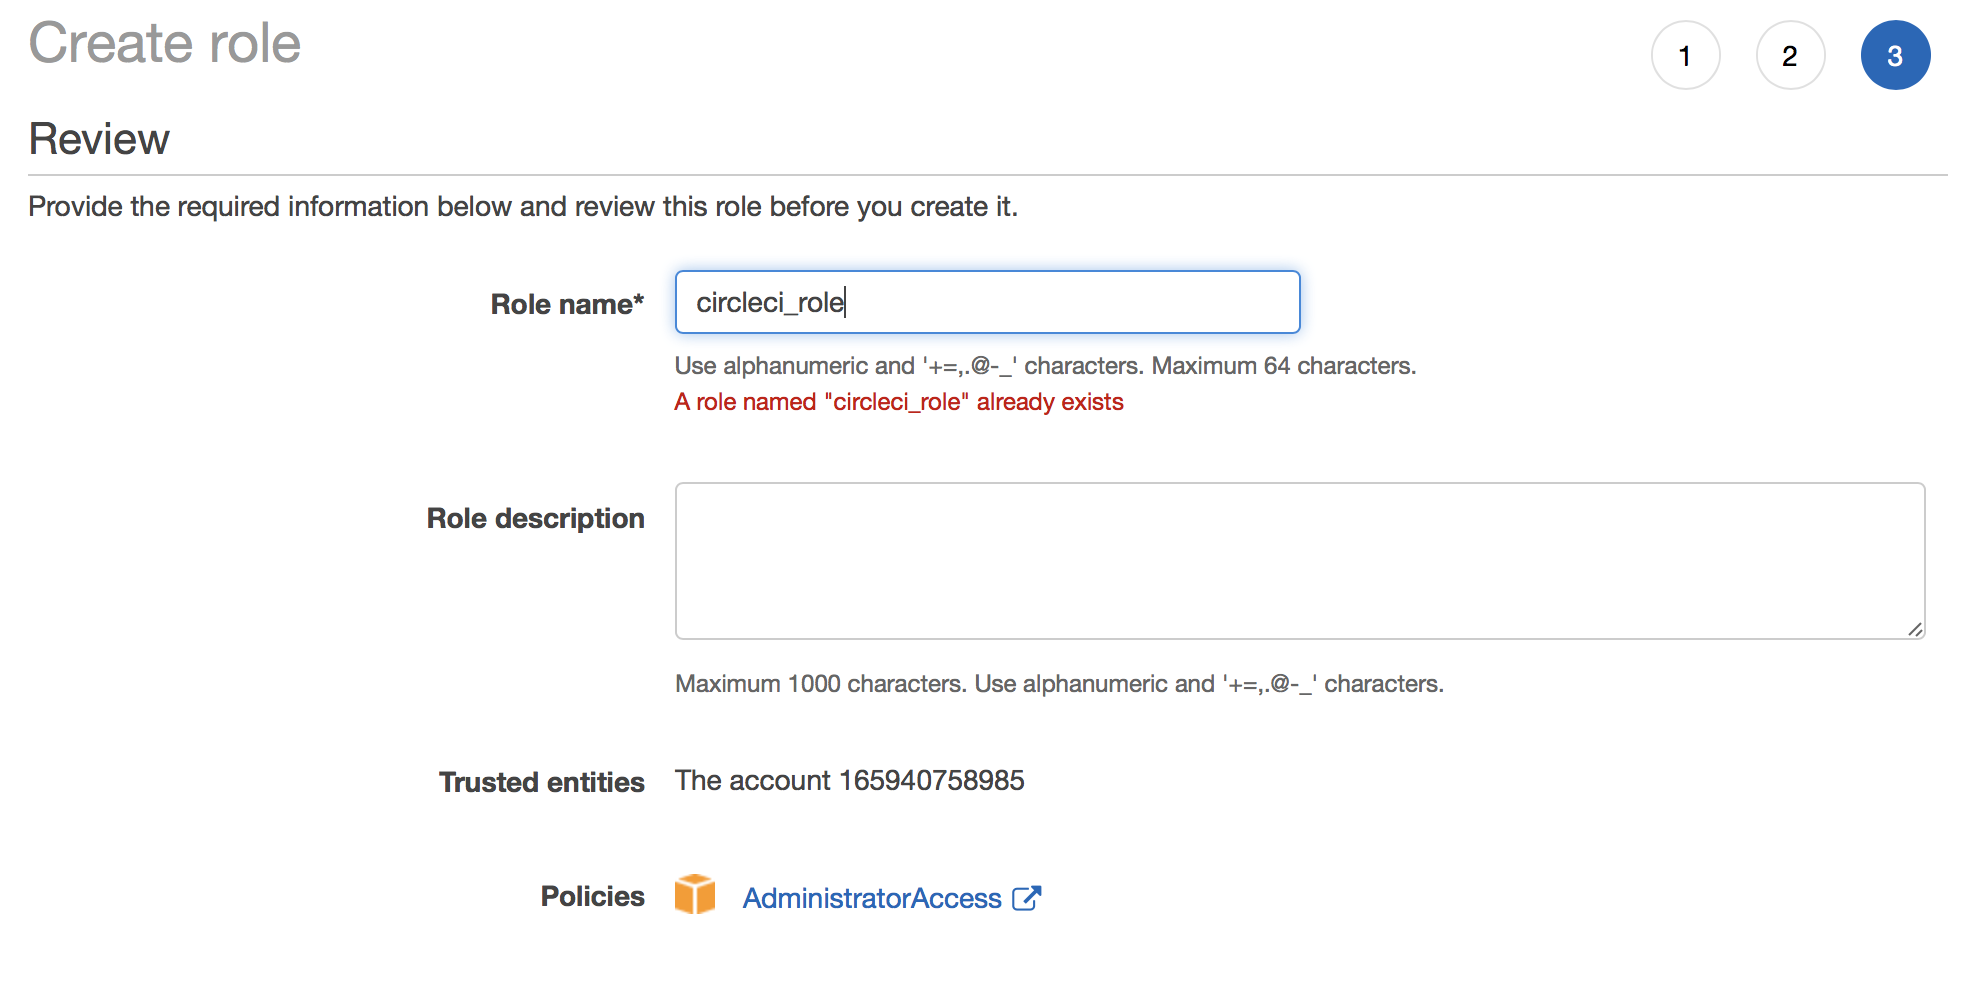
And finally let’s set a name for the role, in our case circleci_role
We now have the role created. We now have to change user accounts (or groups) in our dev account to allow them to switch to this role and hence, access the production account.
We’re going to do this for a particular user, but you can choose a group as well. That will depend on how do you want to organise your team and your organisation. Do you want everybody to be able to deploy directly to prod or we just want that the CI user can deploy to prod? Second approach sounds sensible.
So, go to your dev account, go to IAM service and select the user you want to give permissions to. Click on permissions -> add inline policy and use the following JSON:
|
|
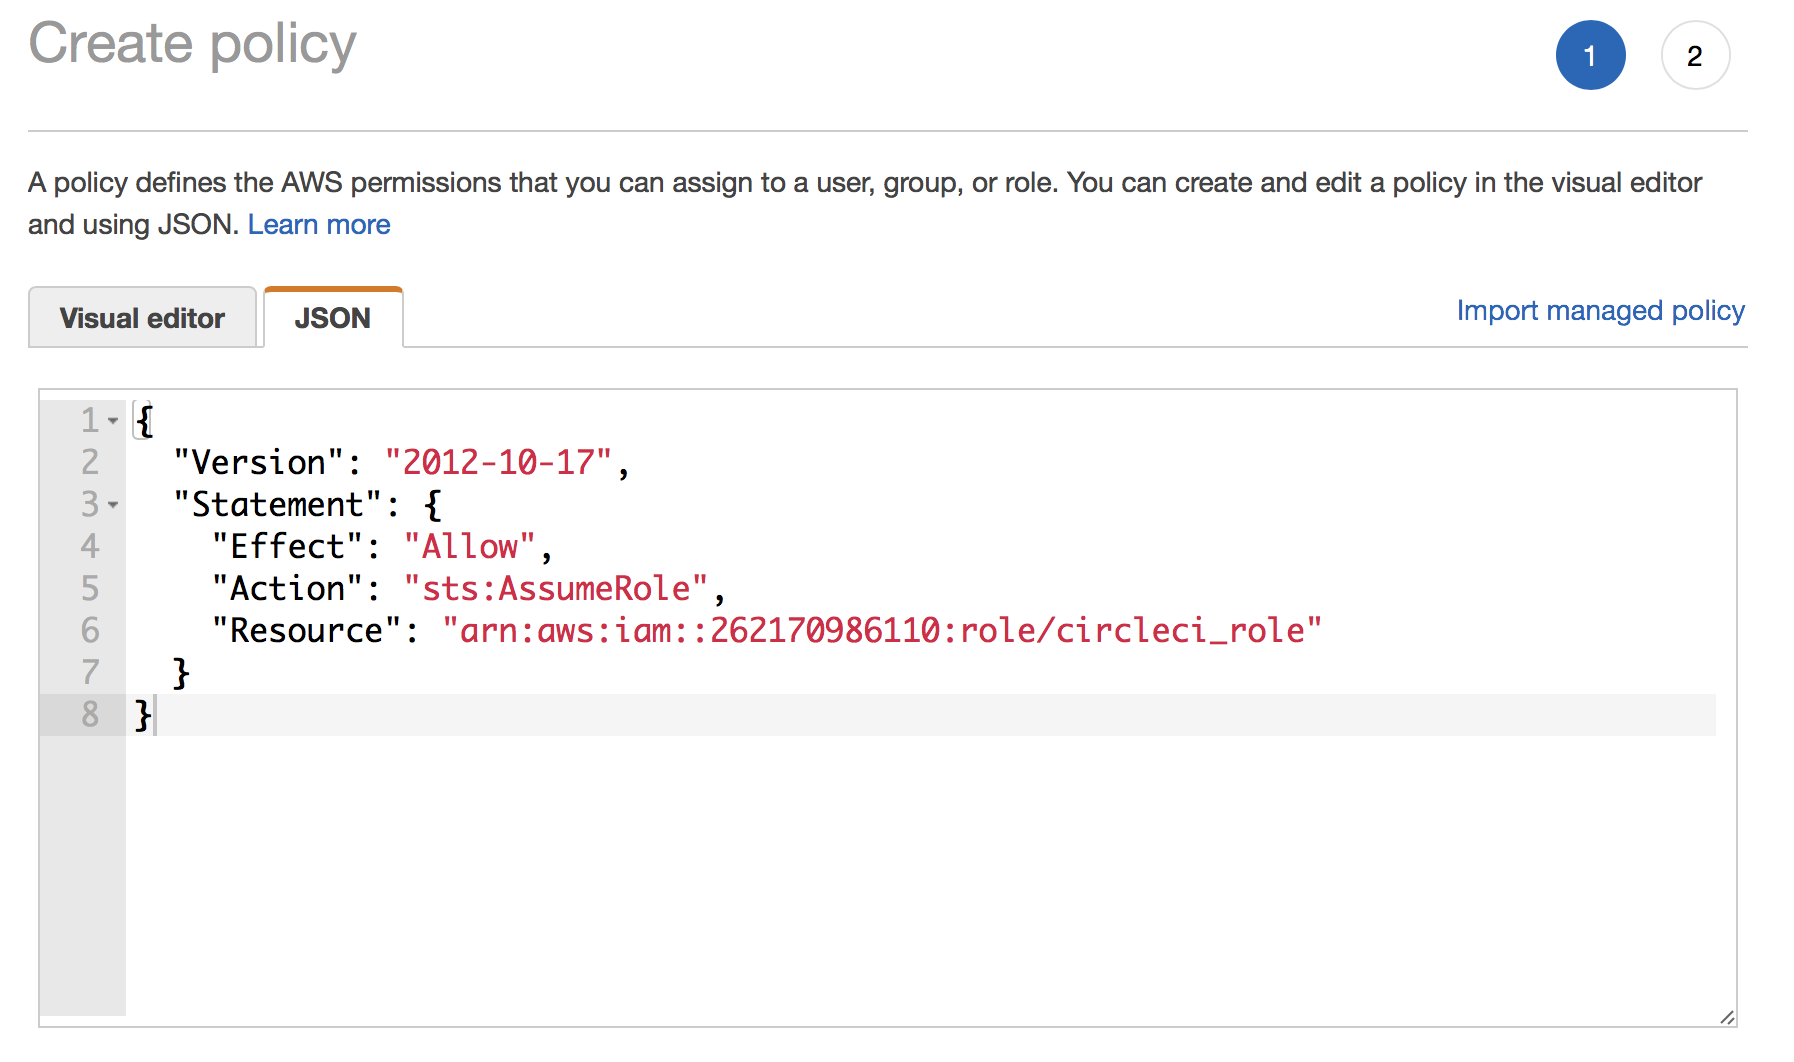
Click on review and set a name for the policy, for example allow-assume-circleci-role-production
It’s time to test it that works. We can do 4 types of tests:
### Test 1 - Using the UI We can assume a role using the website UI. Click on your username and then “Switch Role”. Fill the following form with the required data: the production account id and the production role we’ve just created.
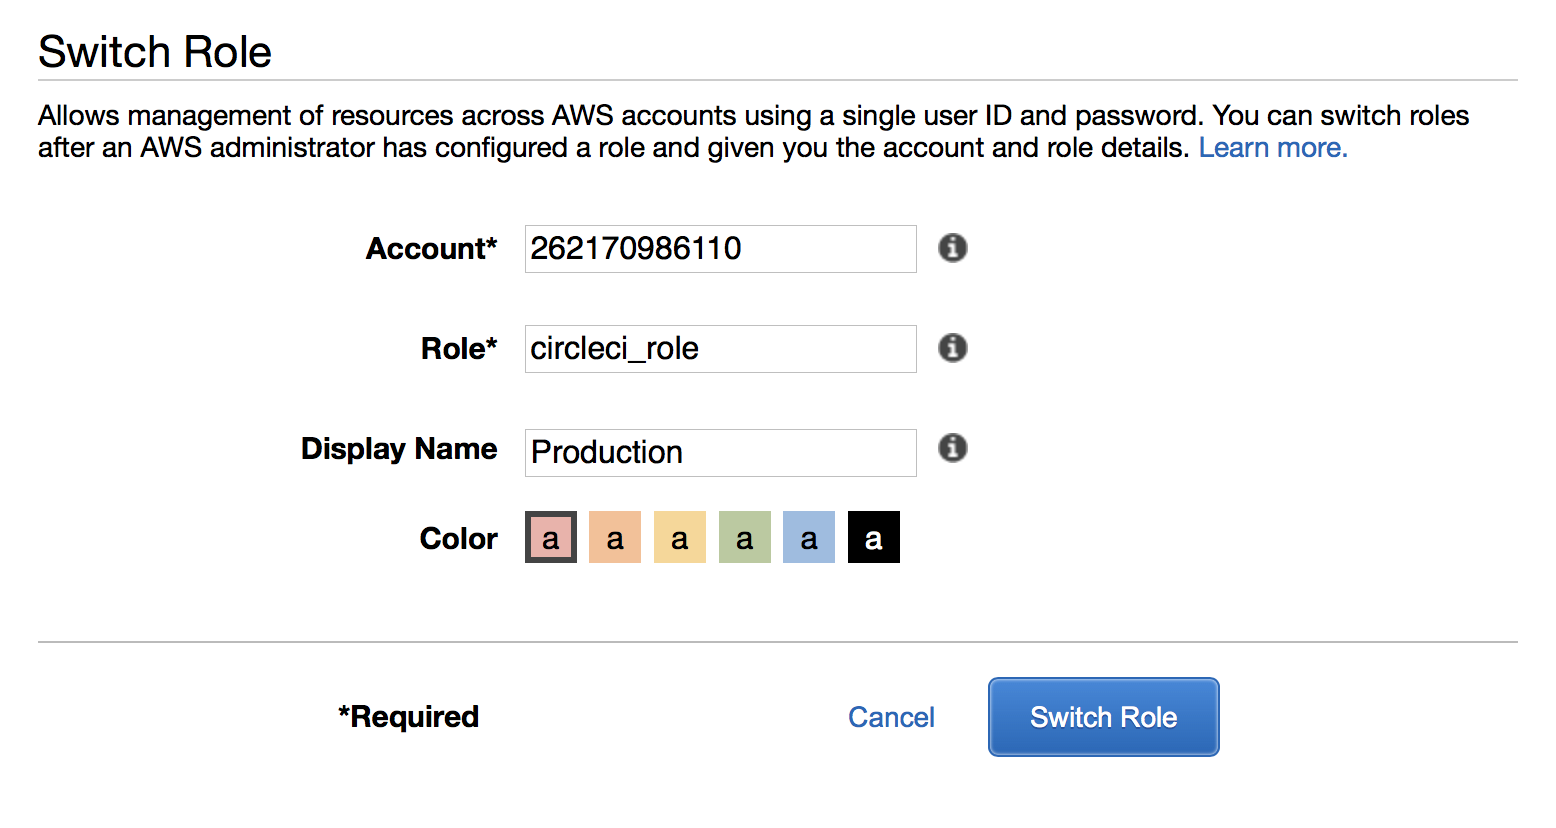
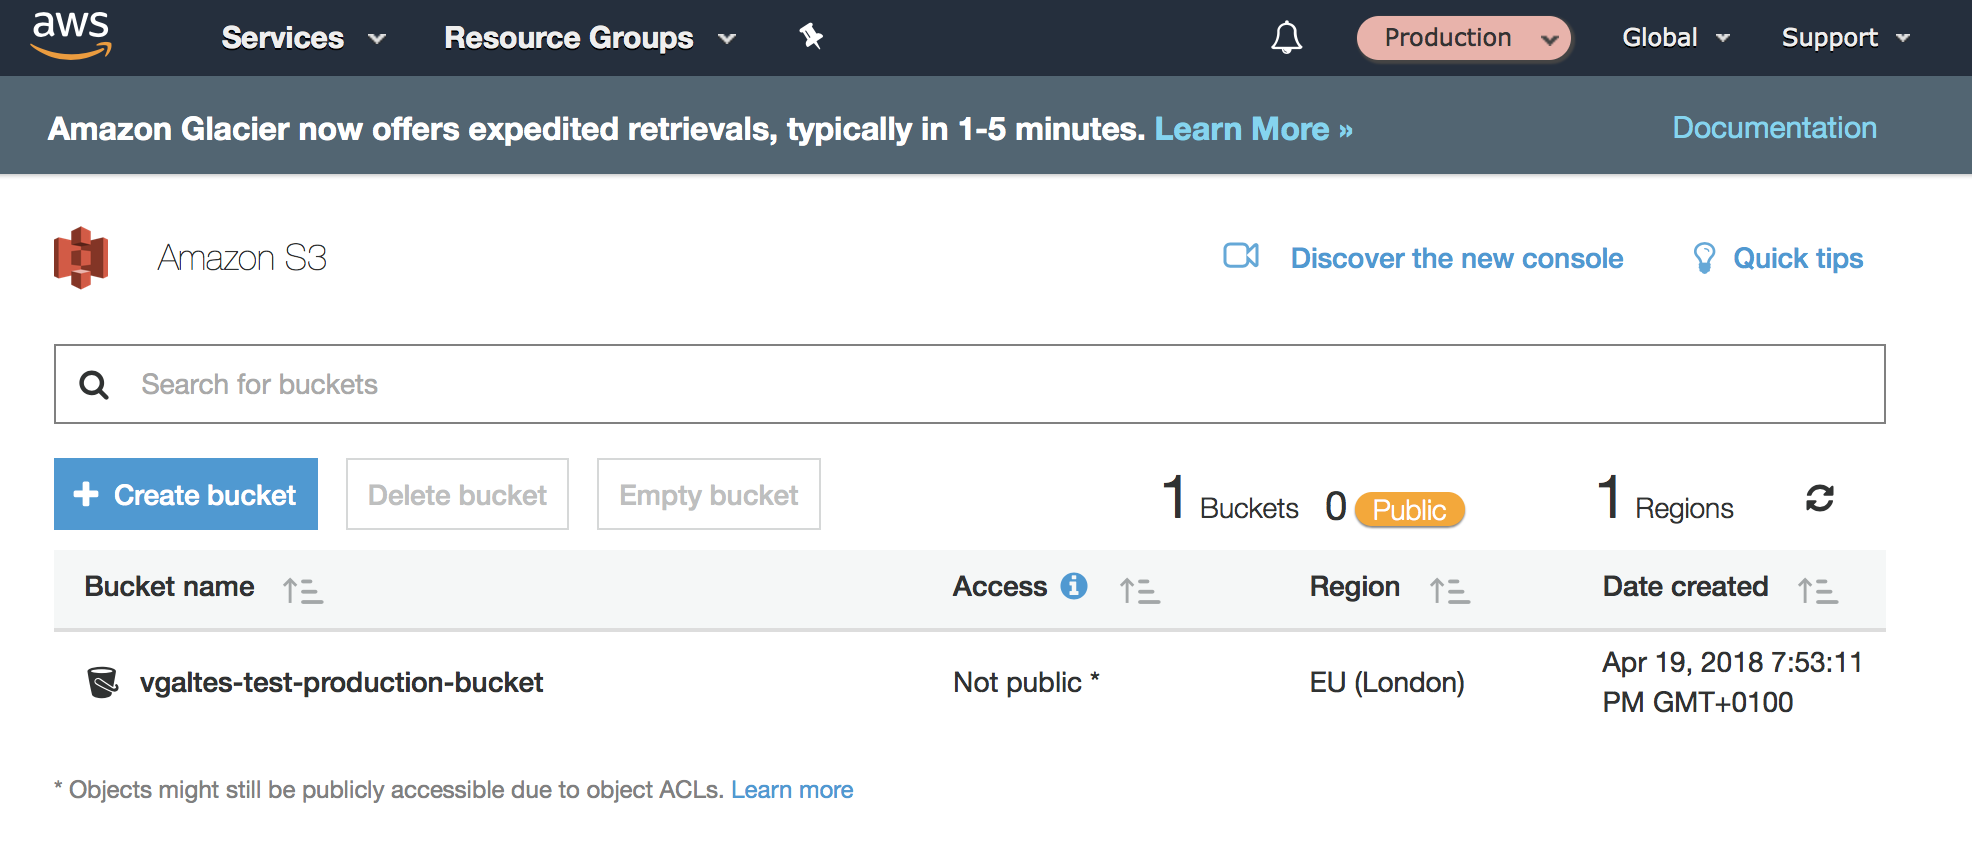
Now, you should see the indicator on the place where your name previously was. You’re now in your production account and you can take a look at your S3 buckets there.
Test 2 - CLI Using profiles
We can assume a role configuring properly an AWS named profile. As you might now, profiles are a way to have more than one account credentials, accessible by name.
Edit your ~/.aws/credentials and add the following configuration:
[vgaltes-prod] role_arn = arn:aws:iam::262170986110:role/circleci_role source_profile = vgaltes-serverless
The source profile is the named profile of your dev account and the role arn is the arn on the production account, the role you want to assume.
Let’s try this. Go to your project base folder and type:
|
|
And you should see your S3 buckets on the production account.
Test 3 - Getting the credentials using the CLI
The third option you have (and the first one that will lead us to what we’d need to do in the CI environment) is to retrieve the credentials needed to log into the production account (a temporary ones) via AWS STS. Open the console and type:
|
|
Where the role arn is the role you want to assume and profile is your dev profile.
This command should return something like this:
|
|
Now we need to use this data. Go to your console and type:
|
|
Obviously you’ll need to use what the previous command has returned.
Now, if you type any command using the AWS CLI it will use this user. Let’s try this. Open a console and type:
|
|
You should see the same bucket than in the previous example.
### Test 4 - Automating the STS access We’re now going to create a bash script to automate what we did in our previous test. Open your favourite editor and type:
|
|
Where role-arn is the role you want to assume and profile is your dev profile. Note that you need to have jq installed.
Give a name to the file (aws-cli-assumerole.sh, for example), give it the required execution permisions (chmod +x aws-cli-assumerole.sh) and source it (source aws-cli-assumerole.sh). Now, you have the production credentials set, so you can try to get the S3 buckets again:
|
|
You should see the production bucket as a result.
Deploying to production using CircleCI
It’s time now to use the script we’ve created to deploy our solution to production. Copy the script into your project, let’s say inside a folder called scripts (scripts/aws-cli-assumerole.sh). Now, you need to update your config.yml in order to call the script before deploying to prod. You might need to change your dependencies sections in order to install the AWS CLI.
|
|
Let’s push this change and see if it works! (Note: the bill might take a bit more time to run now, as it has to install the AWS CLI. A possible workaround is to use a Docker image with the CLI already installed. Check the CircleCI documentation to know how to do this.)
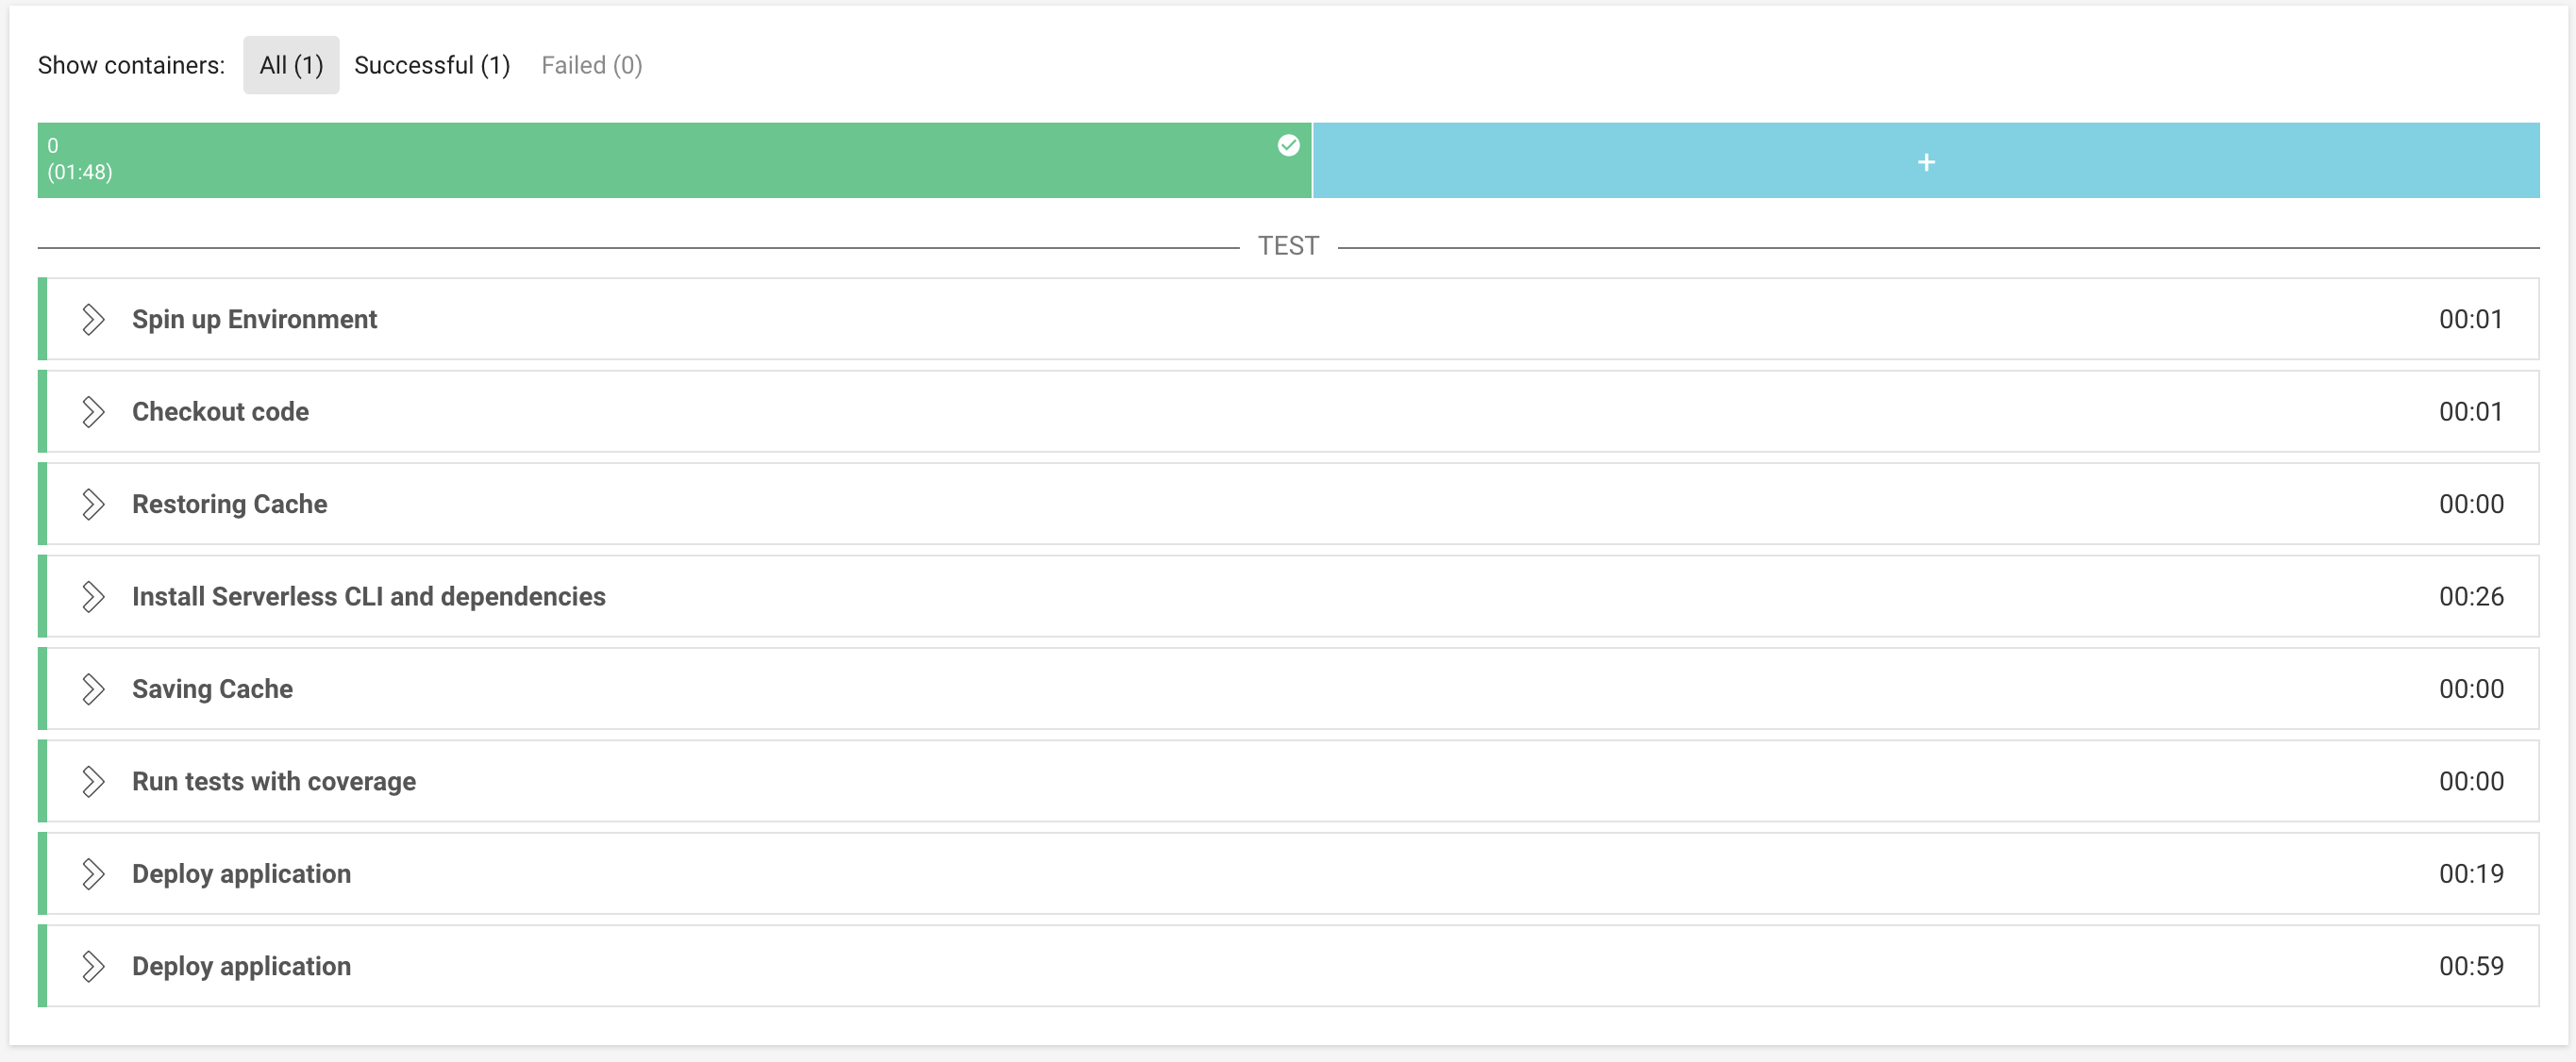
Build looks promising, let’s take a look at our production account:
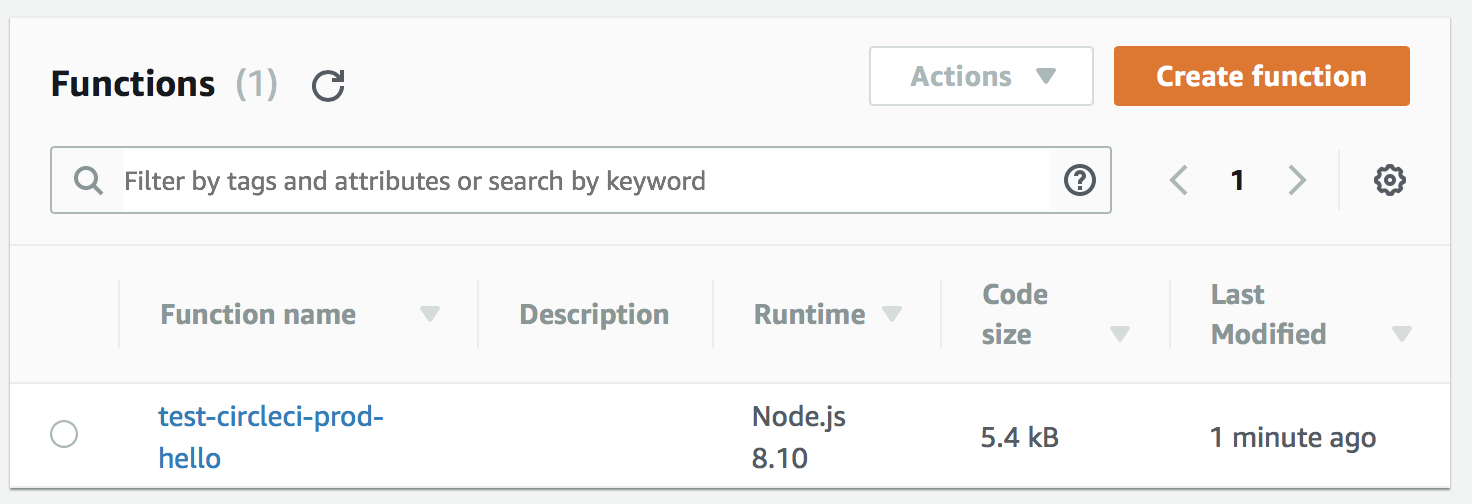
Voilà! Look what’s there!!
Final touch
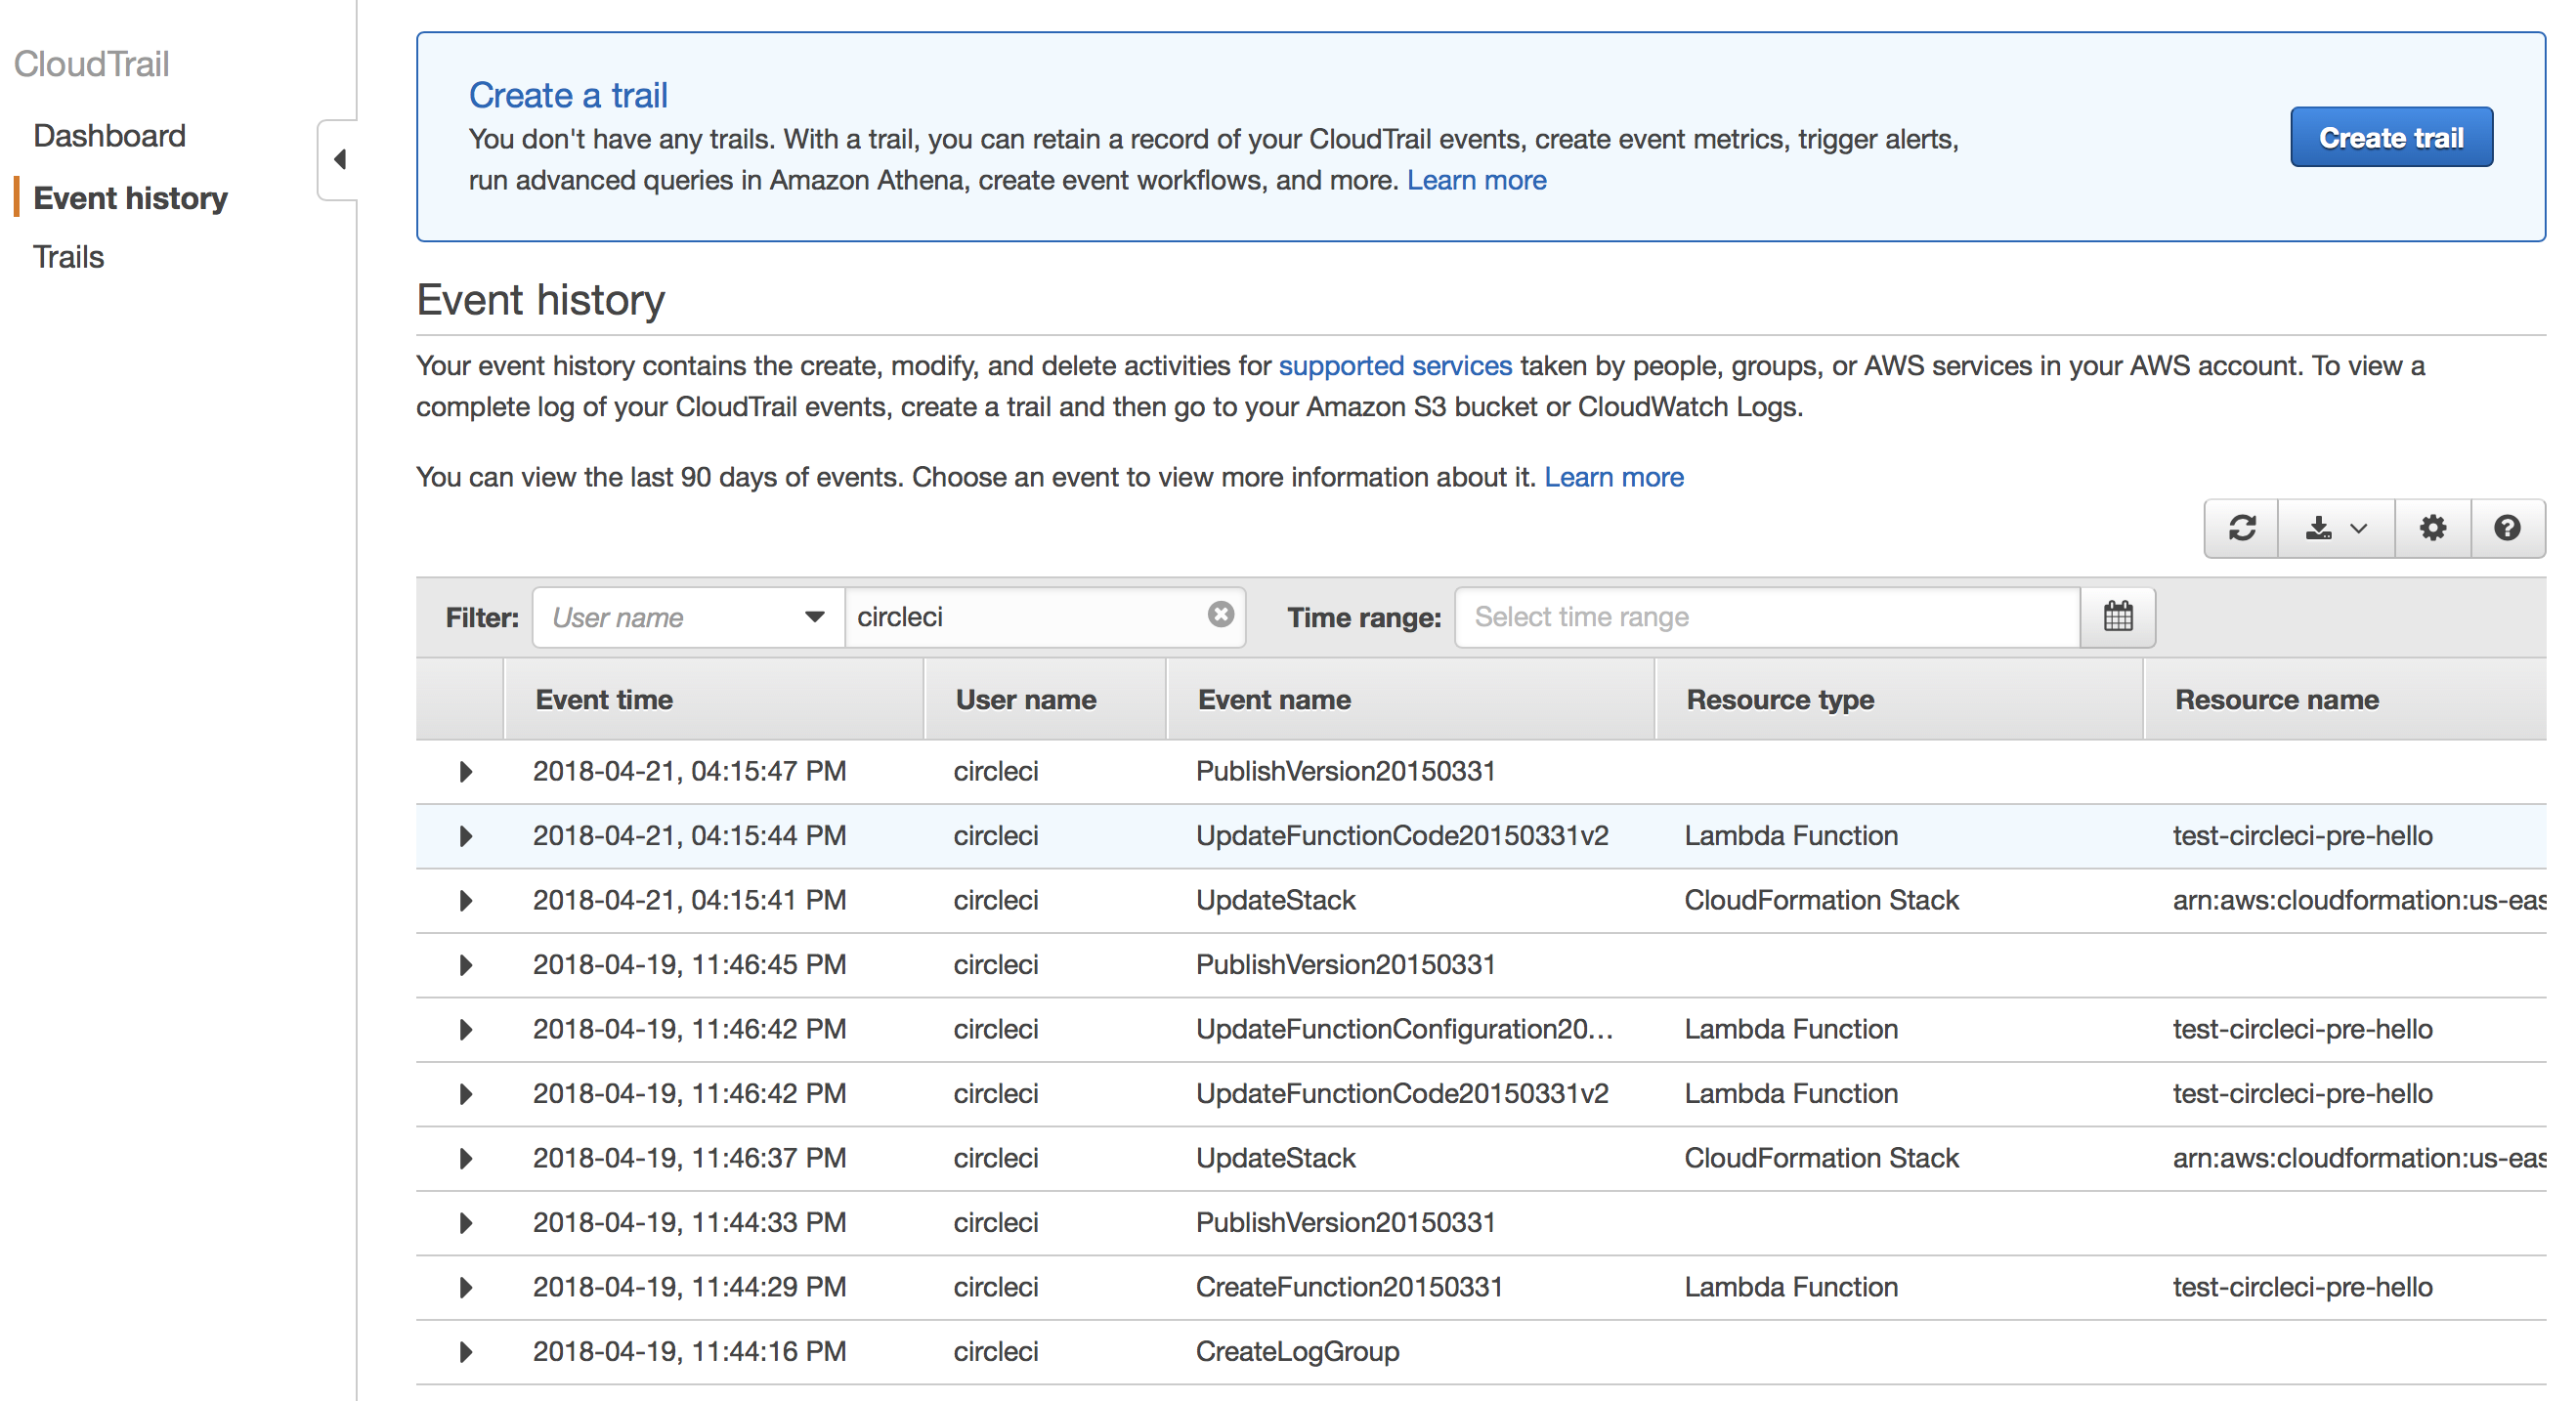
We’re using and administrator account to deploy to production, which is not a very good idea. We should restrict the permissions of that account by setting the appropiate permissions to it creating a custom policy. In order to know which permissions you need to set, you can use the Serverless Policy Generator. Another option is to go to Cloud Trail in your development account and look for the event history of your ci user, in my case circleci.
Author Vicenç García
LastMod 19-04-2018