Deploying Azure Functions using CircleCI
Contents
In the last article we saw how to deploy an azure function from the CLI. In this article we’ll see how we can use the same script to deploy the function from a continuous integration environment. In this case we’ll use CircleCI.
Creating a new docker image
As we saw, if we want to deploy the Function App using the same script we’d need to use the Azure CLI and the Azure Functions Core Tools. We will need the .Net Core SDK to be installed to be able to build the solution. Currently there isn’t any pre-built CircleCI Docker Images with all of that installed, so we’ll need to create our own image. Fortunately, the CircleCI people makes this easy to do. What we’ll need to do is follow the instructions that you can find here.
Let’s start forking the repository into our account. The next step is to add your Docker Hub username (DOCKER_USERNAME) and password (DOCKER_PASSWORD) to CircleCI (yes, you need to creat an account there). I’ve added this into the project specific environment variables. After that, run the make ready and make setup to prepare the different files that we’ll use to create the Docker image and publish it to Docker Hub. I’ve selected UBUNTU_XENIAL as the image base, and selected to install Python version 3.7.1. Now it’s time to commit and push your changes and see what happens.
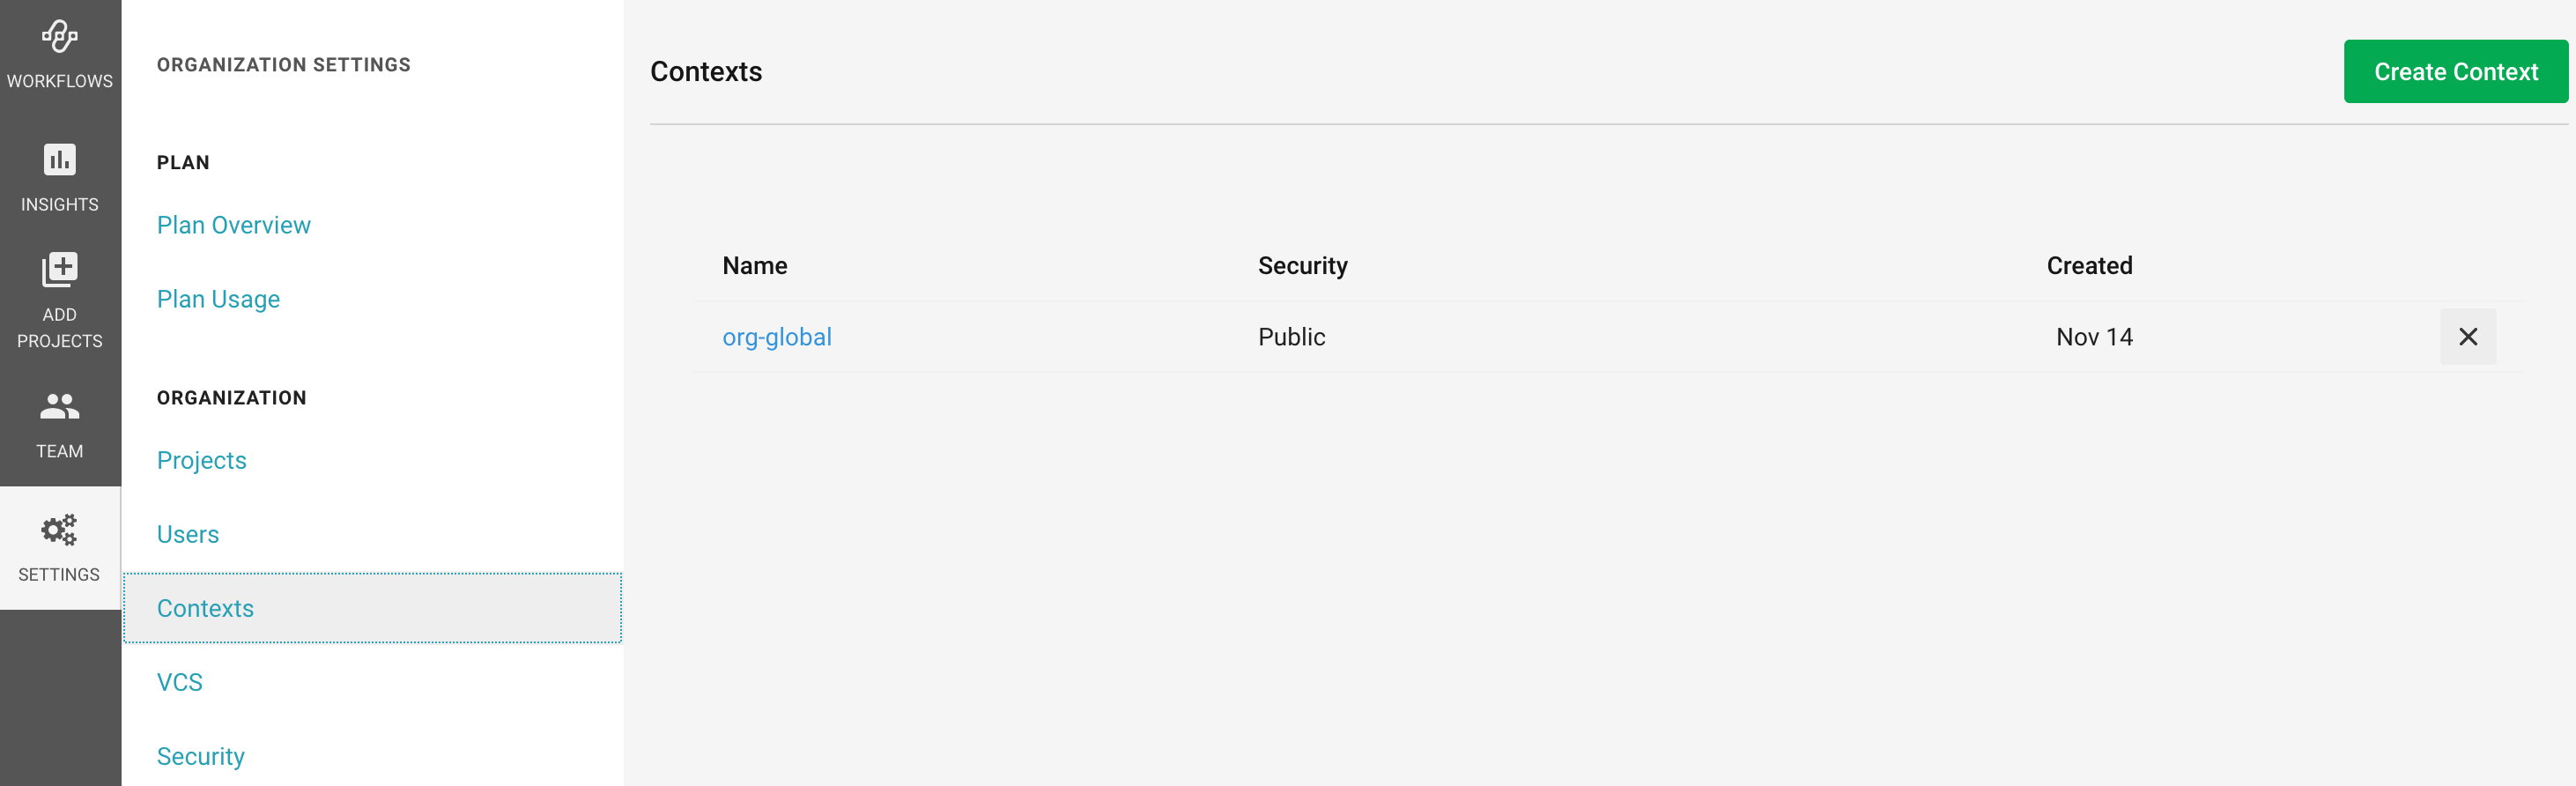
What will happen is that the build will not work. It will complain that the org-global context doesn’t exist. What do you need to do is to create this context. So, go Settings -> Contexts and add a new context.
Now, if you rebuild the workflow it won’t work either, because the file has some errors. Let’s fix this errors replacing the current content of the file by this (feel free to change the name of the image and the tag, but if you do this, remember to change the name of the image in the test_image job):
|
|
So, let’s commit and push and see this working.
The next step is to install the tools we need. How this works, is that CircleCI will create the Dockerfile running the generate.sh script. If you take a look at the script you will see that is creating a Dockerfile using echo’s. So, what we need to do is update this script to install what we need. Take into account that if you change your base image (Ubuntu Xenial) you might need to change some of the following instructinos. Let’s start adding what we need to install the AzureCLI:
|
|
The next step is to install the .Net Core SDK:
|
|
And finally let’s install the Azure Functions Core Tools:
|
|
Next step is to add some tests to check that everything is correctly installed. This project is using BATS to perform the tests. So, let’s add some tests to make sure we’ve installed everything correctly. Edit the tests.bats file and add the following lines at the end of the file:
|
|
Cool, you can now commit and push and hopefully you’ll see the build passing a new docker image in your Docker Hub account. It’s time to create a build definition for our Azure Functions project.
Create a new Service Principal
When we deployed the Function App from our local environment, we used az login with a username and a password. From our CI agent we will use a service principal. So, the first thing we need is to create a new one. Open a new terminal session and type az ad sp create-for-rbac --name <ServicePrincipalName> --password <PASSWORD>. You can find more information about how to create a service principal here.
Create a new build definition
Let’s go to your Azure Functions project (the one we created in the last article) and create a folder called .circleci with a file called config.yml inside. This is our build definition file.
First thing we need to do is to specify that we want to use our newly created image to build this project. So, add this as the first lines of your config.yml file:
|
|
Next, we need to specify the different steps of our build. The first one is to checkout the code:
|
|
Then, we need to login into our Azure account:
|
|
As you can see, we’re using three environment variables. So, you’ll need to add them to the project settings. You’ll have the information from the step where you’ve created the Service Principal.
And finally, we need to deploy the Function App:
|
|
Feel free to change the service name, the location and the stage.
Let’s commit, push and see if we’ve deployed the Function App.
Adding settings
The build is green, which is good, but if we go to the portal we’ll see that everything has beed deployed but the HelloWorld function. What has happened? Let’s take a look at the build output:
|
|
Weird. The .Net SDK is not publishing anything in the /root/repo/bin/Debug/netcoreapp2.1/publish folder, and therefore nothing is deployed to Azure. What’s happening?
Adding local.settings.json
It turns out that the Azure Functions Core Tools needs a parameter that exists on the local.settings.json file. But this file is on the .gitignore file and it’s not safe to upload it to the repository. What can we do? Well, we can create the minimum file that we need in order to be able to deploy the function. Let’s add this step to our build configuration file, just before the deploy step:
|
|
Let’s commit and push and see if the function is deployed…
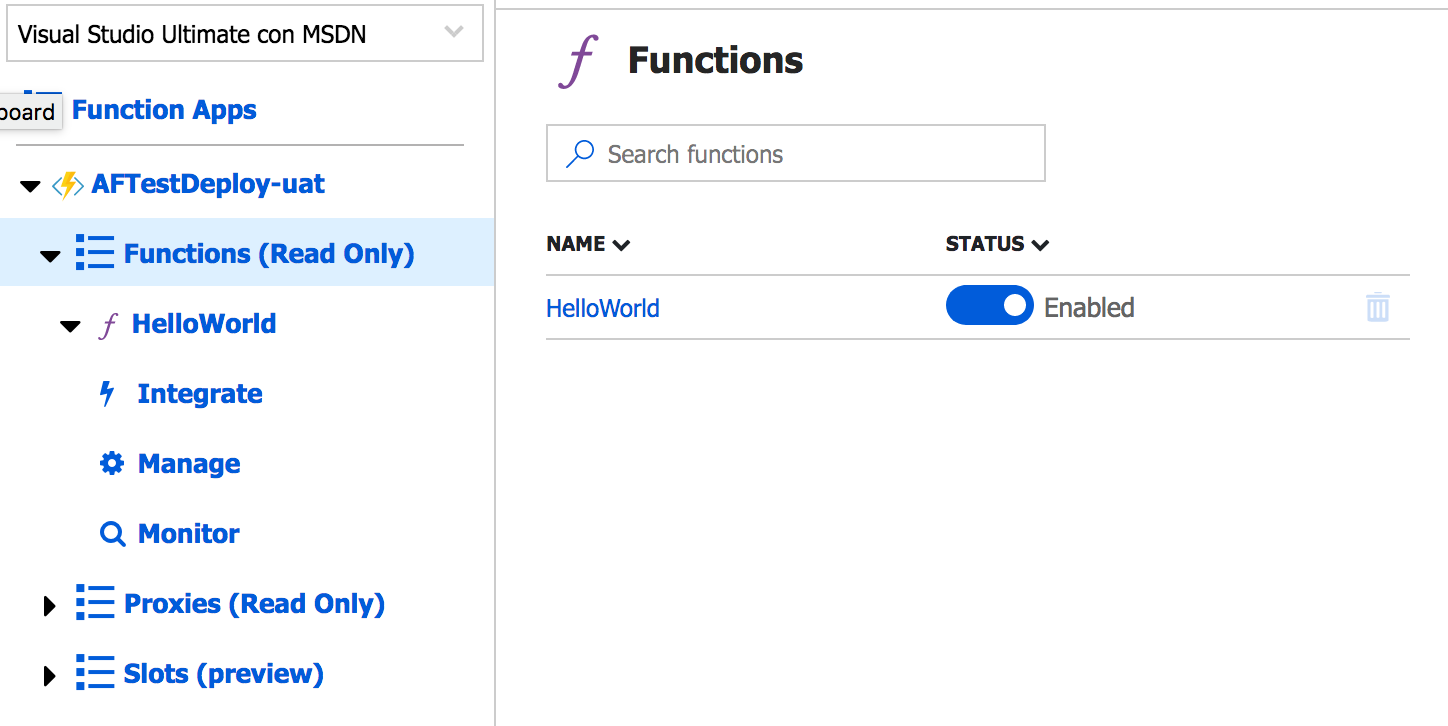
Voilà! Here it is!
Summary
In this article we’ve seen how we can use CircleCI to deploy and Function App. We had to create a new Docker image and create a build definition file that uses it.
Author Vicenç García
LastMod 15-11-2018