Learning Kotlin: configuring Kotest with Gradle
Contents
I’m about to start a new job. This will be a huge challenge for me, as I’m going to be developing in Kotlin. I’ve spent all of my professional life working with .Net, so I need to learn LOTS of things. As I believe that writing down what you learn is the best way to solidify it, I’ll be documenting all that I learn (maybe not all, but a bing chunk of it :D). Don’t expect this to be a guide to learn Kotlin, or Gradle, or whatever, but just a dump of my brain. Yet, I hope you can learn something. Feel free to correct me if I’m doing anything wrong, or suggesting best ways to do it.
Installing the tools
We’ll be using IntelliJ, Gradle, Kotlin, and Kotest. I’ll be using a Mac, so if you have Windows some steps won’t work for you.
The first thing you need to do is to install brew. You can do this with this command:
|
|
Once you have brew, you can configure your machine in many ways. I recommend you to use dotfiles. In this tutorial we will install everything by hand so the steps will be clearer.
The next step is to install IntelliJ. You can do this by going to it’s product web site
After that, we will install sdkman. Sdkman is a nice tool to install diferent versions of different sdks. In our case, we will use it to install Java and Gradle. So, let’s install Sdkman first:
|
|
Once we have Sdkman installed, we are ready to install Gradle and Java. Let’s start with Gradle
|
|
And we can continue with Java. In our case, we need Java 17.
|
|
Creating the project
We’re now ready to create our very simple test project. The goal of the project will be to learn to setup a project with Grale and Kotest.
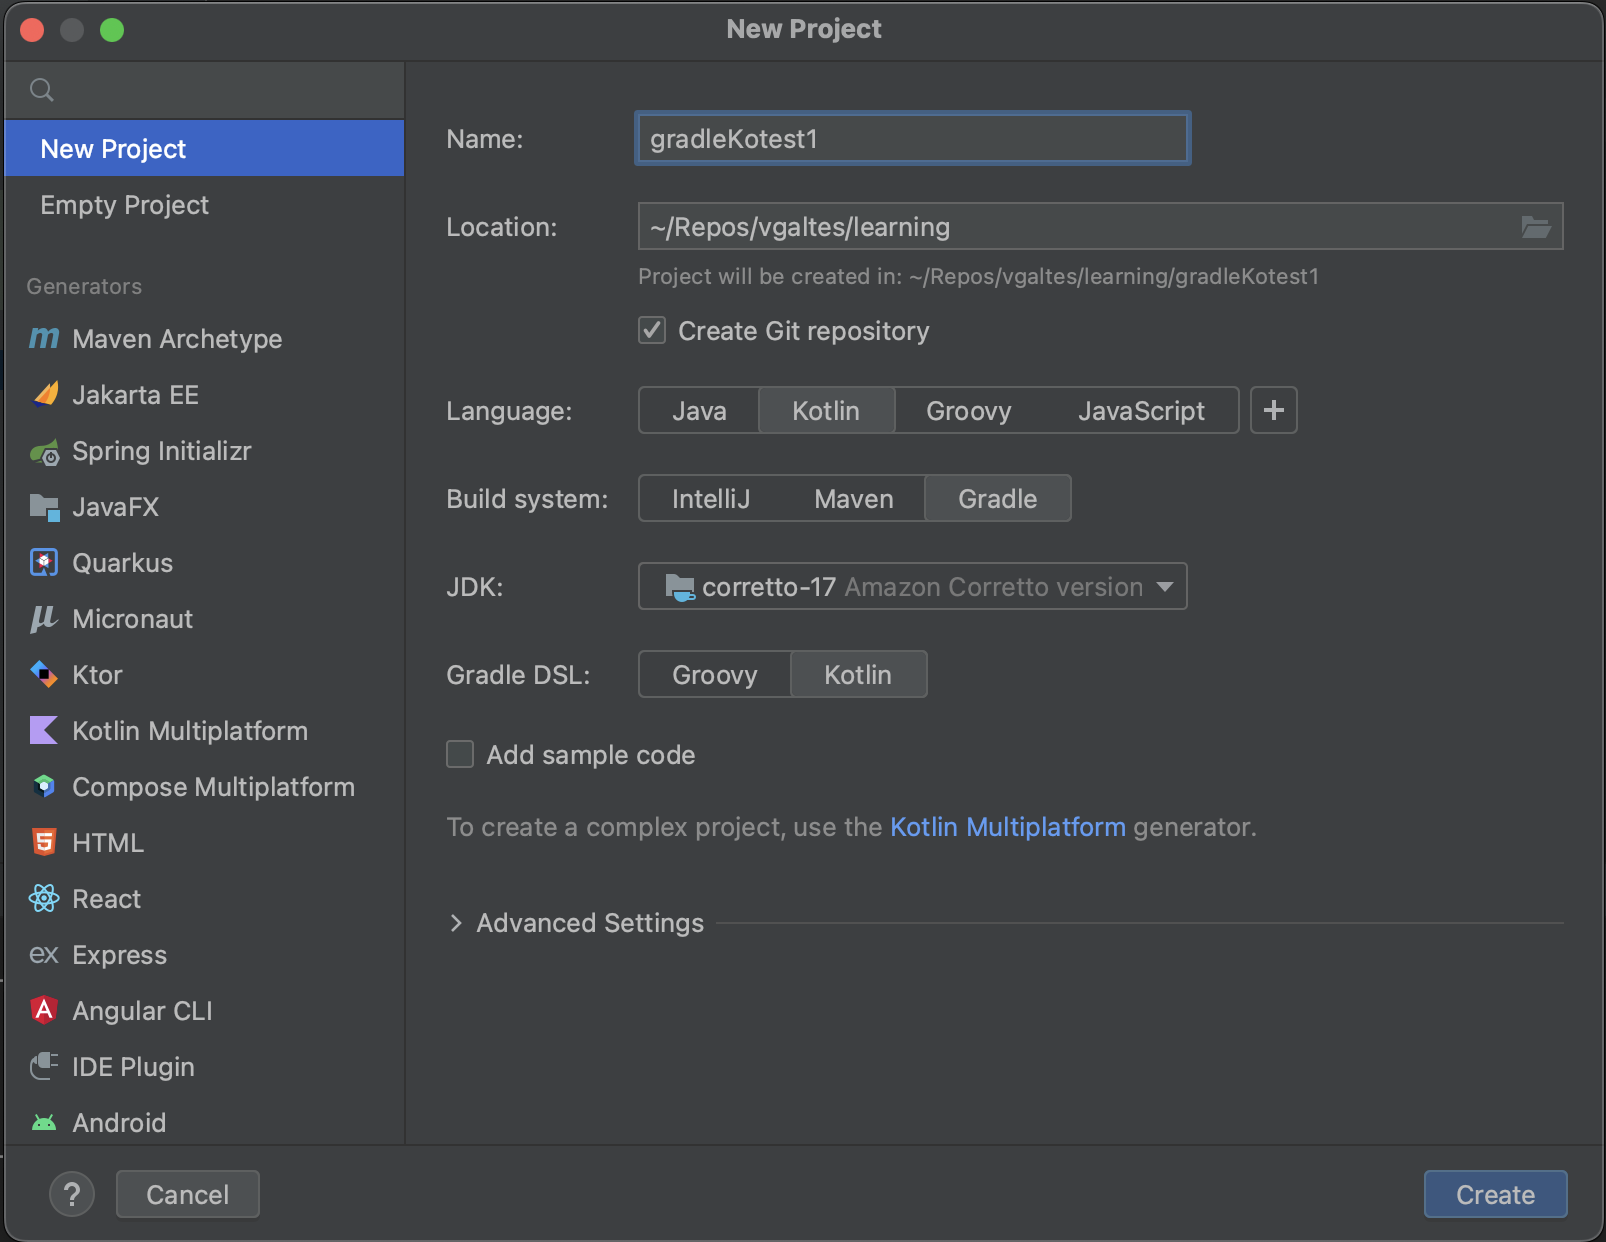
So, go to IntelliJ and create a new project. Language should be Kotlin, build system should be Gradle, select the Java 17 SDK, and select Kotlin as the Gradle DSL.

Configure Gradle
Now we need to configure Gradle so we can run the build. The file that we’re going to be working on is the one called build.gradle.kts. First we will need to add an import:
|
|
Change the dependencies section so we can use Kotest:
|
|
Now we need to “link” Kotest with JUnit5. To do this, we need to add useJUnitPlatform() inside the tasks with type Test:
|
|
This will do the job along the junit5 dependency we added earlier. As you can see we’re also configuring the output of the Gradle test task, so we will have more information if something goes wrong.
Writing our first tests
Now it’s time to add some simple test. Go to the src/test/kotlin and create a new file called MyFirstTest with the following content:
|
|
Running the tests
We have several options to run the tests. Let’s start with the most visual way. Let’s go to IntelliJ -> Preferences -> Plugins and search for kotest. Install the plugin and you’ll be able to run the tests from the file or from the plugin window.
If you want to run the tests from the build you need to run the following command:
|
|
Summary
In this article, we’ve seen how to setup a project to start learning Kotlin and its platform. We now can run tests using Kotest so we can write a lot of them to learn how Kotlin works.
Author Vicenç García
LastMod 29-10-2022