AWS Step Functions using .Net Core
Contents
If my good friend Alan Gorton is right
Functions will eat servers. #serverless https://t.co/4Rc1cDnM73
— Alan Gorton (@develogue) February 19, 2017
we’d better be prepared. In this article we’ll see how we can develop AWS Lambda Functions using .Net Core and deploy them and Step Functions using the serverless framework.
Installing dependencies
You should be able to follow this tutorial using a Windows machine or a Mac. The first step is to install all the things we’re going to need.
Let’s start with .Net Core. The limitation that AWS imposes is to target netcoreapp1.0,so we can just download the last version of .Net Core. To do that, go to https://www.microsoft.com/net/core and follow the instructions.
The next step is to install the serverless framework. You will need to have NodeJs installed and then follow the instructions they have in their website. It’s very straightforward.
And we’re good to go! Nothing else is needed.
Accessing AWS
To be able to run the serverless framework commands we’ll need an account with its access keys. There are a couple of ways to configure them in your environment as it’s explained in https://serverless.com/framework/docs/providers/aws/guide/credentials/ In my case, I’m going to use a profile. You can use whatever you want.
Folder structure
We’re going to have a root folder that will contain the different folders for each lambda function. The only file that will exist in that folder will be the serverless.yml for the step function. So, go ahead and create the root folder
mkdir TestServerlessStepFunctions
We’re now ready to create our first lambda function.
Creating a lambda function
The serverless framework allows you to create a project scaffolding for your lambda project. It has a couple of limitations though:
- It creates a project that you need to work with it with the version 1.0.0-preview2-003131 of the .Net Core SDK. That’s not the last version, is the version that still uses the project.json file.
- It doesn’t allow you to create an F# project.
I’ll send a pull request to fix both problems, but it’s not there yet.
Apart from some utility files, the framework only adds a file to an standard project, so we can create the project by ourselves using the .Net Core CLI and manually add that file. Let’s do that:
dotnet new classlib --framework netcoreapp1.0 --name UppercaseLambda --output UppercaseLambda
This creates a new C# project targeting netcoreapp1.0 called UppercaseLambda in a folder called UppercaseLambda. That’s all we need.
Rename the cs file to UppercaseLambda.cs and copy the following content there:
using System;
using Amazon.Lambda.Core;

// Assembly attribute to enable the Lambda function's JSON input to be converted into a .NET class.
[assembly: LambdaSerializerAttribute(typeof(Amazon.Lambda.Serialization.Json.JsonSerializer))]

namespace TestServerlessStepFunctions
{
    public class UppercaseLambda
    {
        public string Uppercase(string request)
        {
            return request.ToUpperInvariant();
        }
    }
}
In order to be able to build this project, we’ll need to add a package. So, go to the project folder and run:
dotnet add package Amazon.Lambda.Serialization.Json
We’re good to go now. Let’s restore the dependencies
dotnet restore

Build the project
dotnet build
And publish it
dotnet publish

What we need to be able to publish the lambda function is to create a zip file with all the files needed to execute the function. We’ll need to create the zip in a folder we can reference later, so let’s create the folder and the zip:
mkdir bin/Debug/netcoreapp1.0/package
zip -Xrj bin/Debug/netcoreapp1.0/package/UpperCaseLambda.zip bin/Debug/netcoreapp1.0/publish/

As you can see, we’re creating a zip with the contents of the publish folder.
We’re just one step away to be able to deploy our Lambda function. If we want to use the serverless framework to do it, we need to create a file called serverless.yml in the package folder. Create the file and copy the following contents:
service: uppercaseService

provider:
    name: aws
    runtime: dotnetcore1.0
    profile: serverless-admin-vgaltes
    region: us-east-1
    stage: dev

package:
    artifact: bin/Debug/netcoreapp1.0/package/UpperCaseLambda.zip

functions:
    Uppercase:
        handler: UppercaseLambda::TestServerlessStepFunctions.UppercaseLambda::Uppercase
If we use different yaml files for each lambda functions, we needd to specify a different service name for each lambda. In the provider section, we’re telling the framework which provider we’re going to use, runtime, user profile, region and stage. Stages are a good way to manage different environments inside the same AWS account.
In the package section we’re specifing which package we’re going to deploy.
And finally, we’re going to define our functions, in our case just one of them. In the handler, we’re going to specify where the function lives, in our case in the UppercaseLambda file, in a class called UppercaseLambda inside a namespace called TestServerlessStepFunctions and the method is called Uppercase.
We’re prepared to deploy the function. We just need to run the following command:
sls deploy -v

The -v flag is to have a verbose output. If everything is configured well we’re going to see how the lambda is correctly deployed in the account.
We can now try the lambda to see if it’s been correctly deployed. To do that, just run
sls invoke -f Uppercase --data "asdf"
We should see “ASDF” as the output.

A basic step function
Now that we have a lambda function, we can use it inside a Step Function. A Step Function is a nice way to orchestrate Lambda functions. You can learn more here https://aws.amazon.com/step-functions/
To be able to deploy a Step Function using the serverless framework we’ll need to install a plugin. So, lets go to the root folder and type:
npm install --save serverless-step-functions
The step function will not have any code associated to it. It will just call the Lambdas we create. So, we just need to create a serverless.yml file in the root folder. Create the file and copy the following contents:
service: TestStepFunctions

custom:
    accountId: <your_account_id>
    uppercaseService: uppercaseService

provider:
    name: aws
    runtime: dotnetcore1.0
    profile: serverless-admin-vgaltes
    region: us-east-1
    stage: dev

stepFunctions:
    stateMachines:
        testStepFunction:
            definition:
                StartAt: Uppercase
                States:
                    Uppercase:
                        Type: Task
                        Resource: arn:aws:lambda:${opt:region}:${self:custom.accountId}:function:${self:custom.uppercaseService}-${opt:stage}-Uppercase
                        End: true

plugins:
- serverless-step-functions
Notice that, as we explained previously, we’re using a different service name here. In the custom section we’re defining some custom variable that we’ll use to properly reference the Lambda function. The meat of the file is in the stepFunctions sections. We’re defining there a new state machine called testStepFunction that has a single state, called Uppercase, which is a Task. In the resource, we’re referencing the arn of the lambda function we’ve created previously. To do that, we need to use the custom variables previously declared.
Finally, but very important, we need to tell the framework that we’re using the step functions plugin.
And that’s all! We can now deploy the Step function. Just type:
sls deploy -v
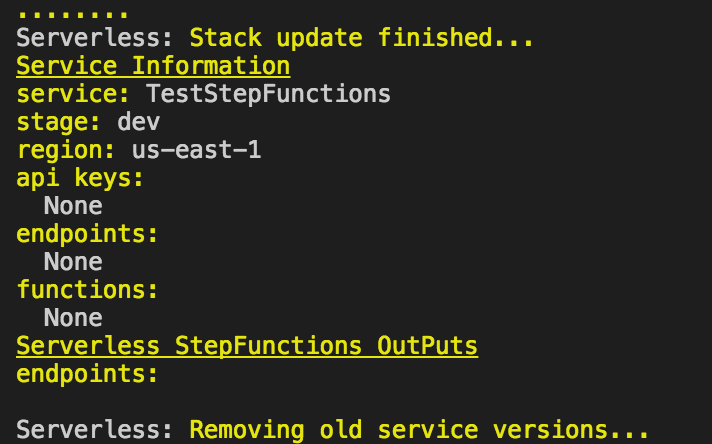
We should see the step function deployed correctly. It’s time to invoke the Step Function and see it working:
sls invoke stepf --name testStepFunction --data '"asdf"'
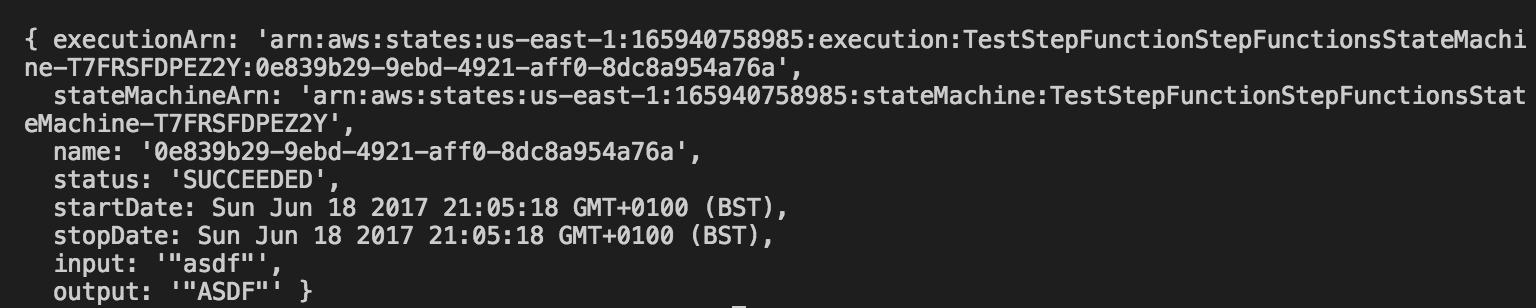
Voilà!!
A bit of FSharp
We’ve seen how to develop a Lambda function using C#. As we’ve seen, at the end we’re compiling the code and publishing it so we can do the same with an F# project. Let’s do it!
First of all, let’s create a new F# project. Go to your root folder and type
dotnet new classlib -lang F# --name SayHelloLambda --output SayHelloLambda
Unfortunately you can’t change the targeted framework using the CLI. So, go to the SayHelloLambda.fsproj file and change the target framework to netcoreapp1.0
As we did with the C# project, we need to add the assembly attribute to our module. Let’s start adding the required package:
dotnet add package Amazon.Lambda.Serialization.Json
Now you can change the contents of the fs file (you can rename it as well if you want). Copy the following contents:
namespace TestServerlessStepFunctions

module SayHelloLambda =
    open Amazon.Lambda.Core
    [<assembly: LambdaSerializerAttribute(typeof<Amazon.Lambda.Serialization.Json.JsonSerializer>)>]
    do()

    let sayHello name =
        sprintf "Hello %s" name
As you can see we’re composing a new string as a return value of our Lambda. We can now build and deploy the project:
dotnet restore
dotnet build
dotnet publish
mkdir bin/Debug/netcoreapp1.0/package
zip -Xrj bin/Debug/netcoreapp1.0/package/SayHelloLambda.zip bin/Debug/netcoreapp1.0/publish/
We just need to add the serverless.yml file. Copy the following contents:
service: sayHelloService

provider:
    name: aws
    runtime: dotnetcore1.0
    profile: serverless-admin-vgaltes
    region: us-east-1
    stage: dev

package:
    artifact: bin/Debug/netcoreapp1.0/package/SayHelloLambda.zip

functions:
    SayHello:
        handler: SayHelloLambda::TestServerlessStepFunctions.SayHelloLambda::sayHello
Nothing new here. We’re ready to deploy now. Let’s do it:
sls deploy -v
Our Lambda function developed in F# is deployed now. Let’s try it:
sls invoke -f SayHello --data "Vicenç"

Great! The F# Lambda function is working now! Time to add the lambda to our Step function. Let’s start adding a new custom variable:
custom:
    accountId: <your_account_id>
    uppercaseService: uppercaseService
    sayHelloService: sayHelloService
And now add the new Lambda to the Step function and link the execution of the previous one to this one:
testStepFunction:
  definition:
    StartAt: Uppercase
    States:
      Uppercase:
        Type: Task
        Resource: arn:aws:lambda:${opt:region}:${self:custom.accountId}:function:${self:custom.uppercaseService}-${opt:stage}-Uppercase
        Next: SayHello
      SayHello:
        Type: Task
        Resource: arn:aws:lambda:${opt:region}:${self:custom.accountId}:function:${self:custom.sayHelloService}-${opt:stage}-SayHello
        End: true
And that’s all we need. You can now deploy the step function:
sls deploy -v
And test it:
sls invoke stepf --name testStepFunction --data '"asdf"'
You should see “Hello ASDF” as output.

Summary
We’ve seen quite a few things in this article. We’ve discovered Step functions, which are a nice way to orchestrate Lambda functions. We’ve seen as well how we can develop Lambda functions using C# or F# thanks to .Net Core. As a side effect, we’ve seen how we can develop all of this using a Mac laptop and not a Windows machine. Hope you enjoyed it!
Author Vicenç García
LastMod 15-06-2017