Wait state in AWS Step Functions using the serverless framework
Contents
In the last article we’ve seen how to the parallel state in a State function. In this article we’ll see how we can use the Wait state using the serverless framework.
The wait state delays the execution of the state function for a certain amount of time. By default, it returns the same object that it receives.
What are we going to code
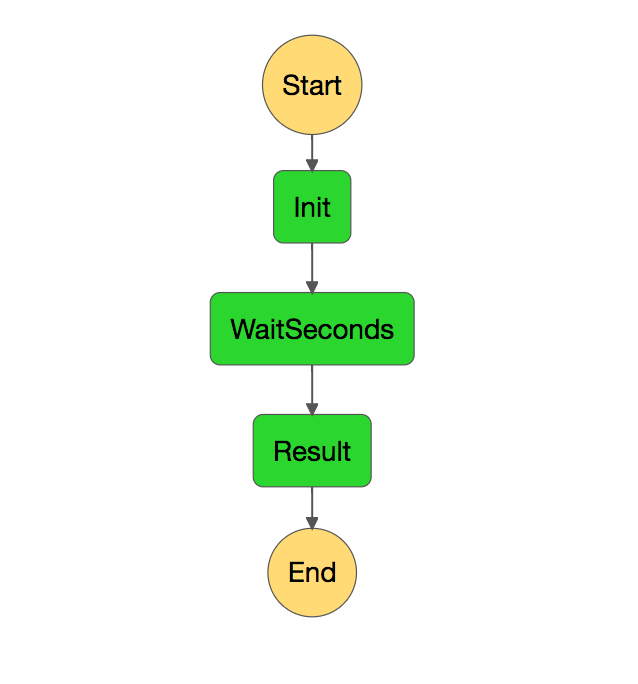
We are going to code the following state function

As you can see we’re going to have an initial function that creates a result with a field called DelaySeconds. Then, we’ll have the wait state and finally a result state that will format the output.
Coding the lambdas
Following the steps of the following article, create two lambdas called InitLambda and ResultLambda with the following code:
InitLambda
public class InitLambda
{
    public InitResult Init(string input){
        return new InitResult(int.Parse(input));
    }
}

public class InitResult{

    public InitResult(int delay)
    {
        DelaySeconds = delay;
    }
    public int DelaySeconds {get;set;}
}
ResultLambda
public class ResultLambda
{
    public string Result(InitResult input){
        return $"The seconds delayed are {input.DelaySeconds}";
    }
}

public class InitResult{

    public InitResult(int delay)
    {
        DelaySeconds = delay;
    }
    public int DelaySeconds {get;set;}
}

// You can have the result class in a shared library
Creating the step function
Now it’s time to create the step function. The code is very similar to our original code, but we’re now introducing a new kind of state. Let’s put here the interesting bits:
stepFunctions:
    stateMachines:
        testParallelStepFunction:
            definition:
                StartAt: Init
                States:
                    Init:
                        Type: Task
                        Resource: arn:aws:lambda:${opt:region}:${self:custom.accountId}:function:${self:custom.initService}-${opt:stage}-Init
                        Next: WaitSeconds
                    WaitSeconds:
                        Type: Wait
                        Seconds: 10
                        Next: Result
                    Result:
                        Type: Task
                        Resource: arn:aws:lambda:${opt:region}:${self:custom.accountId}:function:${self:custom.resultService}-${opt:stage}-Result
                        End: true
As you can see we have a new task state called WaitSeconds which is of type Wait. In this first case we are specifying that we want to wait 10 seconds. Let’s run the step function from the UI and see if it waits the desired time.

It works!
Let’s see which other alternatives do we have.
Specifying a timestamp
It can be possible that we need a step to be executed at a certain time. If we want that, we can specify the timestamp field:
WaitSeconds:
    Type: Wait
    Timestamp: "2017-06-20T20:58:00Z"
    Next: Result
The timestamp, as the documentation says, must conform to the RFC3339 profile of ISO 8601, with the further restrictions that an uppercase T must separate the date and time portions, and an uppercase Z must denote that a numeric time zone offset is not present. In our case, we’re saying that we want to wait until 2017/06/20 20:58 UTC.
Let’s deploy and execute the step function from the UI to see if it works:

Non-hardcoded duration
We don’t need to always hardcode the value of the duration or the timestamp. We can use a path from the state’s input data to specify. If we want to do that, we need to specify the state in this way:
WaitSeconds:
    Type: Wait
    SecondsPath: "$.DelaySeconds"
    Next: Result
In our case, we’re going to use the field DelaySeconds of the input data to read the amount of seconds we want to wait. We can do the same thing with the timestamp using the field TimestampPath.
Summary
We’ve seen another possible state that you can use when defining a State Function: the wait step. We’ve seen how we configure this kind of step in four different ways.
Author Vicenç García
LastMod 21-06-2017